

So after all the questions about where our fuel filters are, how many there are etc etc I decided to make this DIY while replacing mine. My car is an 05 V6, so there may be slight differences, especially with 2003-2004 Tibs with the returnless fuel system (I believe the main filter is different). In my owner's manual it says to replace the fuel filter every 37,500 miles (strange interval I know). I checked hmaservice for an 08 and it says the same thing. For an 04 it says every 52,500. Follow your specific manual.
So let's get started. Tools: 12mm socket with extension; 8mm socket with extension (phillips screwdriver might work); pliers; flathead screwdriver; bucket (recommended)
![Image]()
Parts: 2 filters--31911-2D000 for the main one (2C000 for 2003 Tibs) and 31090-2D050 for the suction filter. Check with your dealer if you have a 4-cyl. I think the parts are still the same for the 4-cyl, but I haven't confirmed that. The main filter I got for about $31 and the sock one $9 (this was at list price though, dealers may vary).
![Image]()
First, you need to remove the rear seat cushion. There are 2 bolts holding the back end in, one in the middle of either seating position as shown here:
![Image]()
Once you have those out, there are 2 tabs holding the front of the cushion, just push in on them to release the clips:
![Image]()
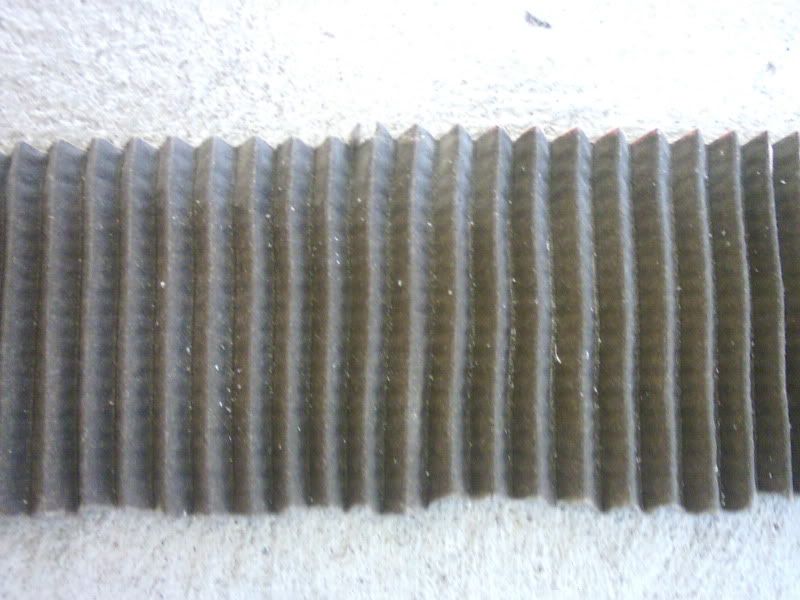
Pull the seat cushion out (watch for the foam catching on the seatbelts) and you'll see the black cover we need to remove next (there was also a felt piece around my seatbelt catches, just pull that out). Just pry up one edge of the cover and pull it off (held on with black adhesive):
![Image]()
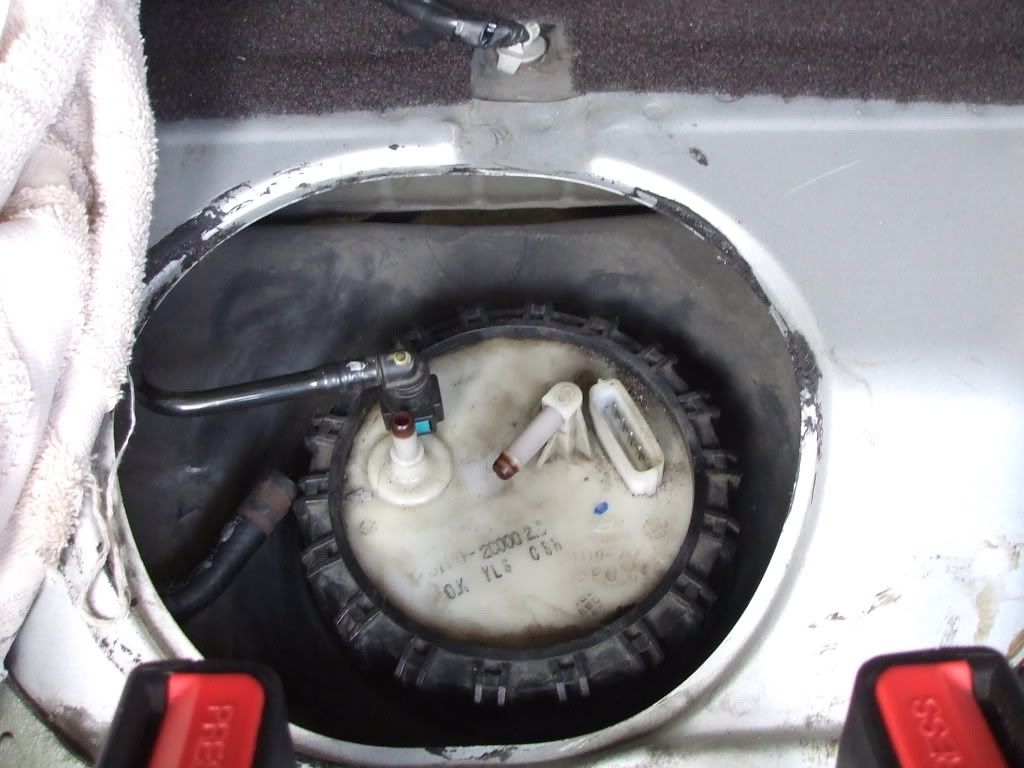
Now you'll see the top of the fuel pump assembly:
![Image]()
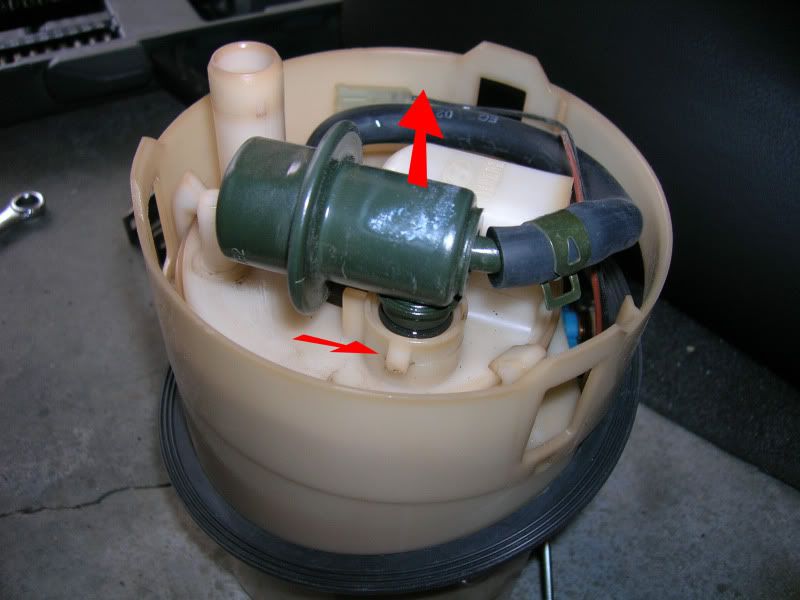
First disconnect the electrical connector. Once you've done so you'll want to start the car and let it idle until it stalls (took a few minutes in my case--note that your fuel gauge will show empty as the electrical signal is gone, don't worry about it). This will take some of the pressure out of the fuel lines. You can also disconnect the negative battery terminal for more security if you want. Put a towel or paper towels aroung the hoses, then disconnect the 2 hoses marked #2 in the pic. The top one has a clamp, use your pliers. it also has a 2nd clamp where the arrow points, I ended up removing both and taking the hose completely off to give more clearance. The bottom one has 2 buttons you push in while pulling the hose off--be ready for a fair amount of fuel to spray out of this one.
Once you have the hoses off, remove all the screws around the edge of the assembly (9 in all). A phillips might work, but I used an 8mm socket to get a better grip on them. Once you have them out, grab the assembly and slowly lift it out of the tank. I had to tilt mine towards the driver's side to get the top part out, but go slowly since before it's all the way out you need to tip it towards the rear of the car to give clearance to the fuel level gauge.
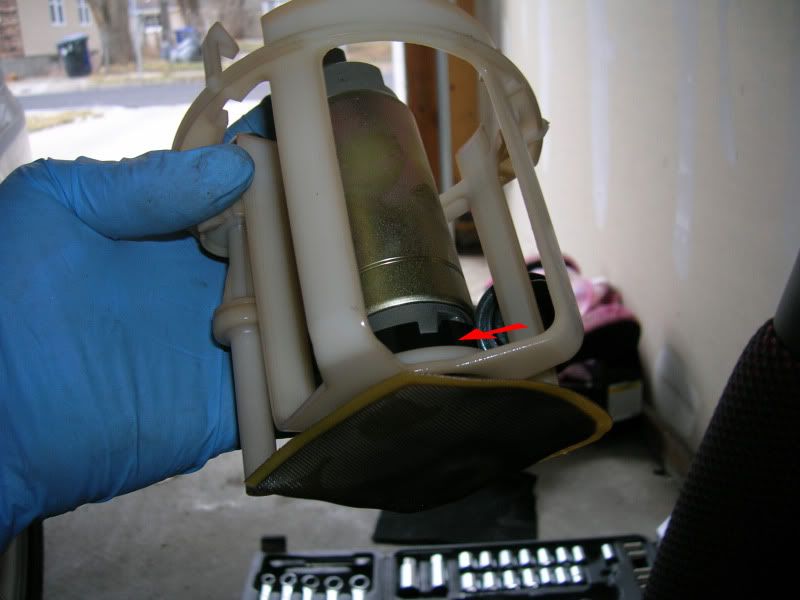
I'd recommend covering the gas tank opening so no debris gets in there--I just used a large towel folded a couple of times. Once the assembly out of the car I highly recommend putting it down in a bucket. Take a close look at how everything lines up too. If you want you can push the little red button on the bottom and drain the fuel out. Mine had a good pint or so of fuel in it. Next, there are 3 large tabs holding the "lid" part on. Start pulling it upwards and push the tabs in to release it. In my case I also found it much easier to also pop the cap off of the fuel filter to let the hose come out better (see arrow below).
![Image]()
The circles show the electrical connectors. The black/yellow one goes from the lid to the fuel pump, I disconnected this one at the fuel pump. The brown/black one goes down to the fuel level gauge, I disconnected this one at the lid end. Once you have both off, set the lid part aside.
Now you need to remove the hose from the fuel filter, to do so there is a metal bracket you need to pry off--it's held on by plastic tabs shown here (bottom arrow). Then pull the hose out of the fuel filter (top arrow).
![Image]()
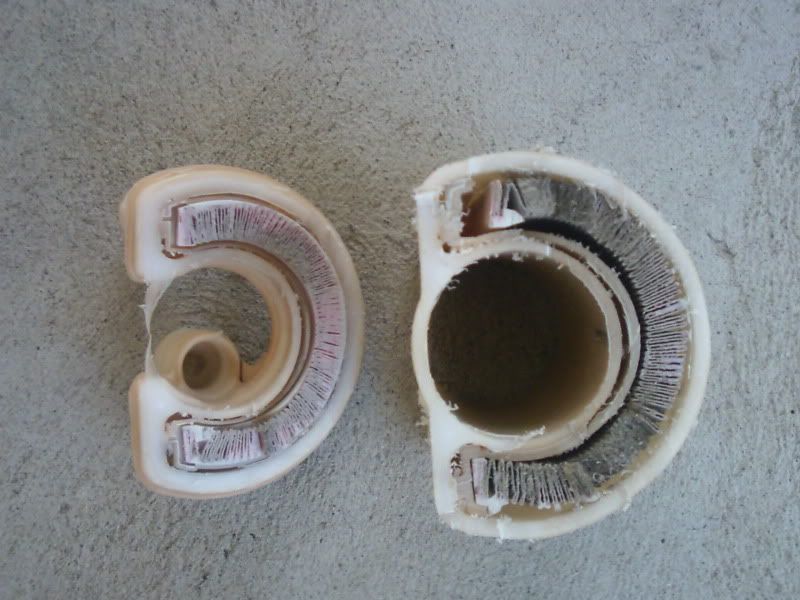
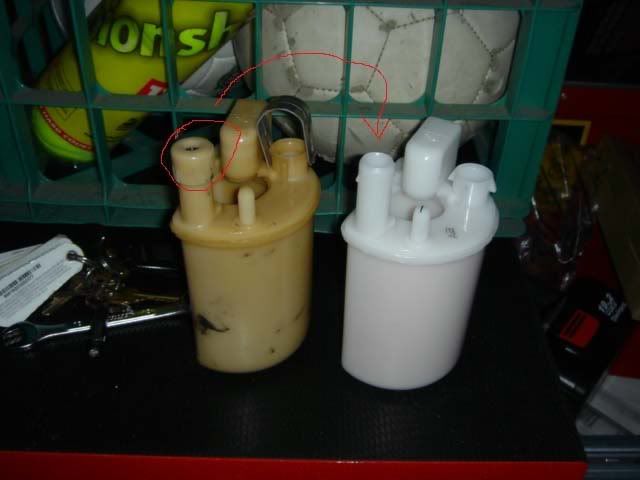
Now to pull the fuel filter out there are 2 clips holding it in. Work it out and compare it to the new filter to make sure they match. At this point you'll want to transfer all the parts from the old one that aren't supplied with the new one. Some of mine came off when removing the lid assembly (the cap I removed to make it easier for example). On the top of the filter there are 4 pieces plus a cap--white washer, black gasket, white washer, black gasket (in that order). Put all these on the new filter and the cap as well. Then, up under the filter there is another gasket (in my case it stayed in the fuel filter as shown here:
![Image]()
![Image]()
That bottom one can be tricky to get out, I ended up using an l-shaped hex key to get at it from the top edge. Make sure you move all these pieces to the new filter or your car won't start. Once you have everything moved over it's time to get the second filter done.
To get to this one, you need to take the fuel pump and housing out of the assembly. There are 3 small tabs below the larger tabs we took the lid off with:
![Image]()
You may have to pry from the inside edge to get them loose. Once you get that assembly out you'll see the sock filter at the very bottom. I was able to get a flathead in the space between the fuel pump and the plastic connector of the sock filter and pry it off:
![Image]()
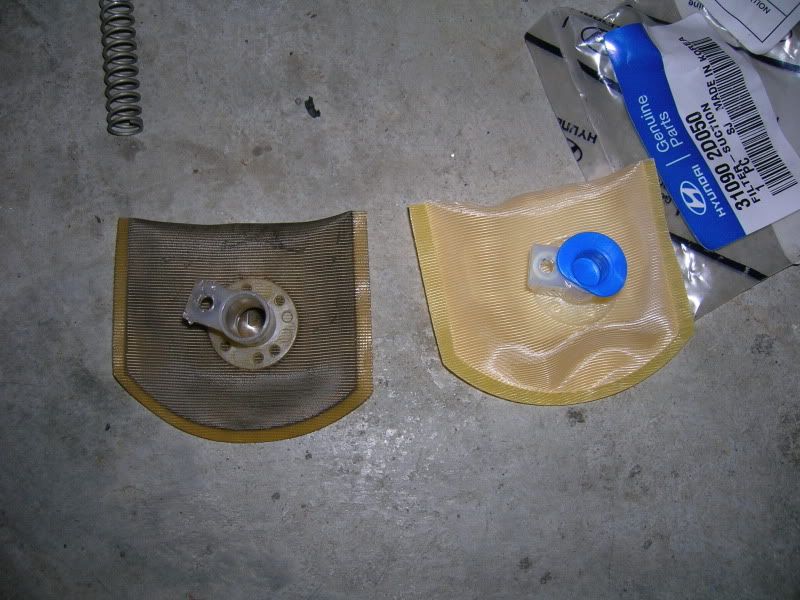
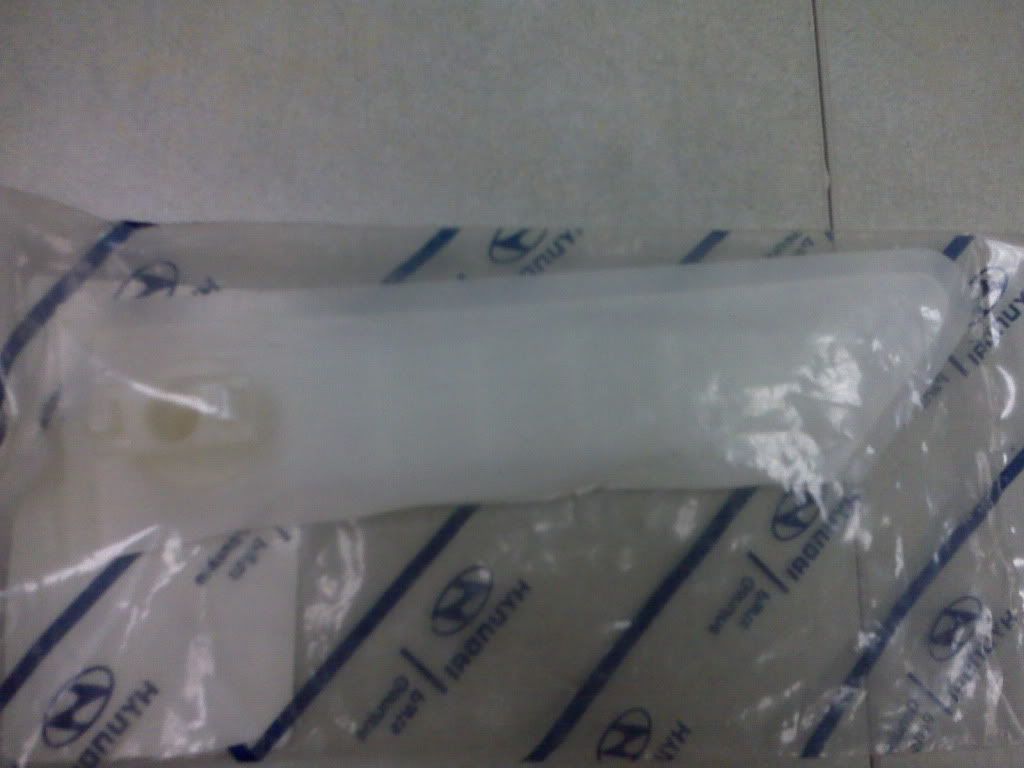
Once it's off, again compare it to the new one and make sure they match. My new one had a blue plastic cap, just throw that away:
![Image]()
You can see how dirty this is (my car had 37,400 miles when I did this). I can't imagine how those of you who wait 100k miles will be. Push the new filter onto the bottom of the fuel pump like the old one was. Not easy at all in my case, but I got it pretty well after plenty of pushing.
Now you're at the end of the disassembly, so just start reversing everything. Put the fuel pump housing back in, then the new fuel filter, connect the hose and bracket, reconnect the electrical connectors and put the lid part back on (note that there are 2 springs that go on it). Put the assembly back into the gas tank, replace the 9 screws and both hoses, and connect the electrical connector (and put the cover back on where it goes). At this point I recommend starting the engine to make sure the pump is working correctly (and the correct fuel level is shown). You may have to cycle the key from off to on a couple of times before cranking the engine. If it doesn't start after 2 or 3 tries you probably missed something. If everything works properly, put the seat cushion back on and you're good to go!
So let's get started. Tools: 12mm socket with extension; 8mm socket with extension (phillips screwdriver might work); pliers; flathead screwdriver; bucket (recommended)
Parts: 2 filters--31911-2D000 for the main one (2C000 for 2003 Tibs) and 31090-2D050 for the suction filter. Check with your dealer if you have a 4-cyl. I think the parts are still the same for the 4-cyl, but I haven't confirmed that. The main filter I got for about $31 and the sock one $9 (this was at list price though, dealers may vary).
First, you need to remove the rear seat cushion. There are 2 bolts holding the back end in, one in the middle of either seating position as shown here:
Once you have those out, there are 2 tabs holding the front of the cushion, just push in on them to release the clips:
Pull the seat cushion out (watch for the foam catching on the seatbelts) and you'll see the black cover we need to remove next (there was also a felt piece around my seatbelt catches, just pull that out). Just pry up one edge of the cover and pull it off (held on with black adhesive):
Now you'll see the top of the fuel pump assembly:
First disconnect the electrical connector. Once you've done so you'll want to start the car and let it idle until it stalls (took a few minutes in my case--note that your fuel gauge will show empty as the electrical signal is gone, don't worry about it). This will take some of the pressure out of the fuel lines. You can also disconnect the negative battery terminal for more security if you want. Put a towel or paper towels aroung the hoses, then disconnect the 2 hoses marked #2 in the pic. The top one has a clamp, use your pliers. it also has a 2nd clamp where the arrow points, I ended up removing both and taking the hose completely off to give more clearance. The bottom one has 2 buttons you push in while pulling the hose off--be ready for a fair amount of fuel to spray out of this one.
Once you have the hoses off, remove all the screws around the edge of the assembly (9 in all). A phillips might work, but I used an 8mm socket to get a better grip on them. Once you have them out, grab the assembly and slowly lift it out of the tank. I had to tilt mine towards the driver's side to get the top part out, but go slowly since before it's all the way out you need to tip it towards the rear of the car to give clearance to the fuel level gauge.
I'd recommend covering the gas tank opening so no debris gets in there--I just used a large towel folded a couple of times. Once the assembly out of the car I highly recommend putting it down in a bucket. Take a close look at how everything lines up too. If you want you can push the little red button on the bottom and drain the fuel out. Mine had a good pint or so of fuel in it. Next, there are 3 large tabs holding the "lid" part on. Start pulling it upwards and push the tabs in to release it. In my case I also found it much easier to also pop the cap off of the fuel filter to let the hose come out better (see arrow below).
The circles show the electrical connectors. The black/yellow one goes from the lid to the fuel pump, I disconnected this one at the fuel pump. The brown/black one goes down to the fuel level gauge, I disconnected this one at the lid end. Once you have both off, set the lid part aside.
Now you need to remove the hose from the fuel filter, to do so there is a metal bracket you need to pry off--it's held on by plastic tabs shown here (bottom arrow). Then pull the hose out of the fuel filter (top arrow).
Now to pull the fuel filter out there are 2 clips holding it in. Work it out and compare it to the new filter to make sure they match. At this point you'll want to transfer all the parts from the old one that aren't supplied with the new one. Some of mine came off when removing the lid assembly (the cap I removed to make it easier for example). On the top of the filter there are 4 pieces plus a cap--white washer, black gasket, white washer, black gasket (in that order). Put all these on the new filter and the cap as well. Then, up under the filter there is another gasket (in my case it stayed in the fuel filter as shown here:
That bottom one can be tricky to get out, I ended up using an l-shaped hex key to get at it from the top edge. Make sure you move all these pieces to the new filter or your car won't start. Once you have everything moved over it's time to get the second filter done.
To get to this one, you need to take the fuel pump and housing out of the assembly. There are 3 small tabs below the larger tabs we took the lid off with:

You may have to pry from the inside edge to get them loose. Once you get that assembly out you'll see the sock filter at the very bottom. I was able to get a flathead in the space between the fuel pump and the plastic connector of the sock filter and pry it off:
Once it's off, again compare it to the new one and make sure they match. My new one had a blue plastic cap, just throw that away:
You can see how dirty this is (my car had 37,400 miles when I did this). I can't imagine how those of you who wait 100k miles will be. Push the new filter onto the bottom of the fuel pump like the old one was. Not easy at all in my case, but I got it pretty well after plenty of pushing.
Now you're at the end of the disassembly, so just start reversing everything. Put the fuel pump housing back in, then the new fuel filter, connect the hose and bracket, reconnect the electrical connectors and put the lid part back on (note that there are 2 springs that go on it). Put the assembly back into the gas tank, replace the 9 screws and both hoses, and connect the electrical connector (and put the cover back on where it goes). At this point I recommend starting the engine to make sure the pump is working correctly (and the correct fuel level is shown). You may have to cycle the key from off to on a couple of times before cranking the engine. If it doesn't start after 2 or 3 tries you probably missed something. If everything works properly, put the seat cushion back on and you're good to go!


")


