Hyundai Tiburon Forums banner

MultiGauge Relocation to Ashtray

27K views 32 replies 23 participants last post by  ultika21  
#1 ·
I did it in my Tib, and it's pretty easy.

_________________________
Tools Needed
- Phillips screw driver
- Dremel (with cutting or grinding wheels) or blade
- 16 gauge wire (if extending ashtray power)

Optional for securing multigauges
- Two small L brackets
- 4 small screws
_________________________

Here's what you do:

  1. Eject the ashtray. You'll see screws that hold it in, so using a shorty screwdriver, remove them.
  2. Once you've unbolted the ashtray, disconnect the wires. Remove the ashtray.
  3. Optional
    To keep the 12V power source from your cig lighter, you can just extend the wires from the connector to where ever you want. The green wire is positive and the black is negative. I re-routed my wires into my glove box and mounted a molex connector there to access the 12V power if I need it.
  4. You'll see 2 plastic tabs that are part of the dash where the ashtray screwed into on either side. You'll need to use a Dremel or knife to cut these off.
  5. Wire up your multigauges.
  6. Mount them in the ashtray location. The gauges should be nice and snug and you shouldn't even need to bolt them in. I used two small L brackets to fasten them to the mission plate.


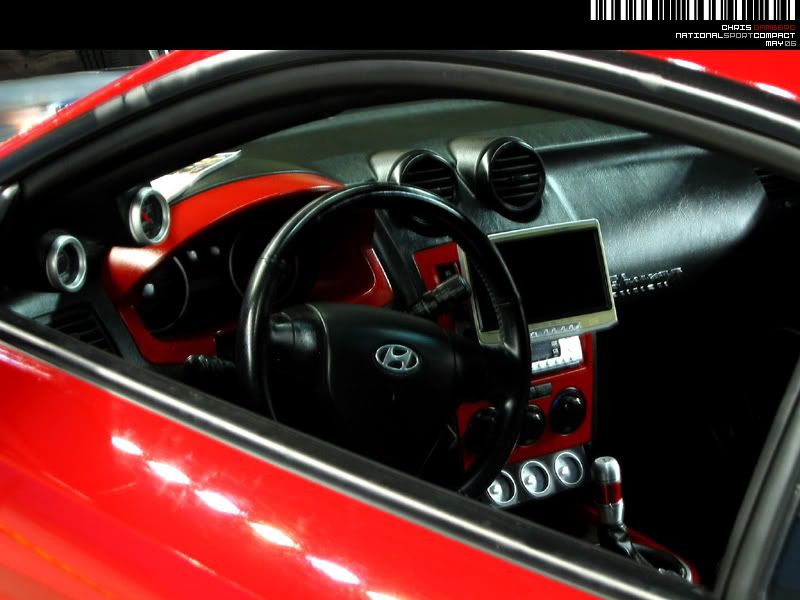
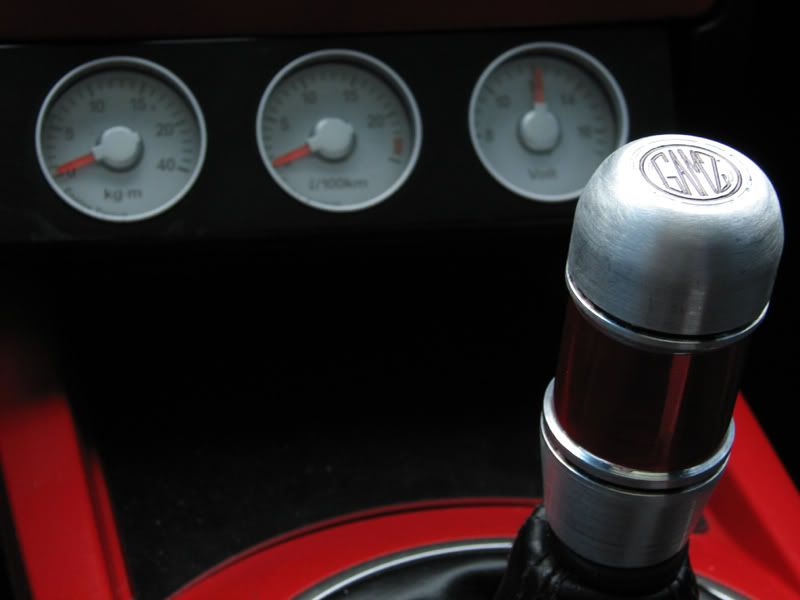
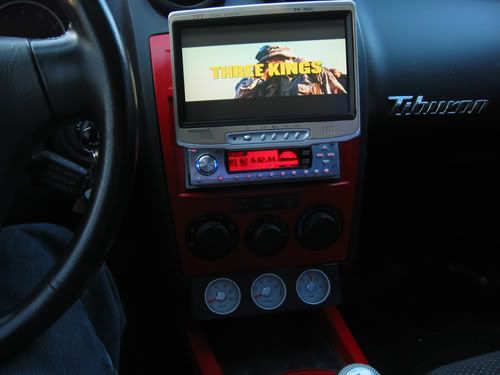
Here are some installed pics. Sorry, I don't have any of the process....

Image


Image


Image
 
#4 ·
Re: DIY- MultiGauge Relocation to Ashtray

I own the 1.6l version (yes, I'm european), wich does not include the multigauge part. But while removing my dash, I noticed a flatcable inside my center-console. About 6-8 collored wires with black housing. Is this the cable that is needed to connect the multigauge?

Grtz
 
#7 ·
Re: DIY- MultiGauge Relocation to Ashtray

I own the 1.6l version (yes, I'm european), wich does not include the multigauge part. But while removing my dash, I noticed a flatcable inside my center-console. About 6-8 collored wires with black housing. Is this the cable that is needed to connect the multigauge?

Grtz
It could be, I don't know. I have an 04 I4 and did not have a connector for the multigauges, so I had to manually wire the harness using this DIY.
 
#5 ·
Re: DIY- MultiGauge Relocation to Ashtray

cool DIY

i might use it
 
#14 ·
Re: DIY- MultiGauge Relocation to Ashtray

Hack saw worked fine for me if u dont have a dremel lol just gotta be careful
 
#16 ·
Re: DIY- MultiGauge Relocation to Ashtray

okay so i just did this today... everyone else who did this: did you just leave the sides and bottom white? or did you spray them? i think i'm going to spray mine black
 
#17 ·
Re: DIY- MultiGauge Relocation to Ashtray

okay so i just did this today... everyone else who did this: did you just leave the sides and bottom white? or did you spray them? i think i'm going to spray mine black
Sorry, forgot to mention I painted the sides of the multigauges black.
 
#23 ·
Re: DIY- MultiGauge Relocation to Ashtray

So I did this mod over the last weekend after having my eye on this thread for over a year. 80% pleased with how it turned out. I still need to paint the sides, or wrap the multigauge unit in some dashboard-looking fabric material to make it blend in a bit more. It also sticks out a little farther than I'd like, but I think that can be fixed by grinding the ashtray mounting plastic back more.

Important! -- Because the top holes that the ashtray & cig lighter screw into must be cut out to make room for the multigauge, this is one of those mods that is semi hard to undo if you're not happy with it or want to revert. ...Just something to think about before you go through with it

Below are some pics to hopefully clear up some noggin-scratching that I ran into. Note the screws for the cig lighter and ash tray are screwed in from behind the dash, lame.

http://i46.photobucket.com/albums/f117/n915aa/ashtray2.jpg

Also, to remove the multigauge from the assembly, I had to pull the stock HU out. After that there are clips on all 4 sides that should (gently) be lifted up to release the multigauge unit. Careful, those plastic clippies break like it's no ones business.

http://i46.photobucket.com/albums/f117/n915aa/multigauge1.jpg

Then here is my finished product. I'm picking up an AVIC-X930BT to fill that gaping hole this weekend, and will post more pics when done.

http://i46.photobucket.com/albums/f117/n915aa/gauges.jpg

Has anyone that's done this bolted or secured the gauges in any way, or just wedged the multigauge in the opening? Also, there is a big of light-bleed from the slots on top of the multigauge. Does anyone think there will be any heat or warping / melting issues if I cover those slots up?

Thoughts, suggestions, comments?
 
#24 ·
Re: DIY- MultiGauge Relocation to Ashtray

**Also,
I'm going to try mounting the cig lighter into the side of the center console, down by the legs, 90* from the shifter, if that makes sense. I wanted to mount a cig lighter on both sides both to keep it symmetrical as well as to have an additional cig lighter for charging stuff etc.. Question being: Can I just splice a second lighter to the existing wires, or will that pose a fire hazard?
 
#26 ·
looks awsome
 
#31 ·
thanks for this diy. did to my tib. very helpful