Hyundai Tiburon Forums banner

Project Wraith

86K views 426 replies 60 participants last post by  bblackmoor  
#1 · (Edited)
I bought my 2003 Hyundai Tiburon GT in 2003. I made a few small mods to it at the time, but since then, I have just done regular maintenance and repaired things when they have broken. Recently, it has been looking a little sad, and I have had the urge to fix it up to its former glory. This is the story of that process.

As required, here is a link to my album.

The post after this one will have numerous photos of my "starting point" (in July 2010). Here is a list of my goals and thoughts, and what I decided to do about them. This first post will be edited as I make progress. [Brackets] mean the part has been purchased, but has not yet been installed.

Brands and prices will be mentioned in case someone wants to suggest a better or cheaper alternative (particularly from NT sponsors, whom I want to support when possible). So please make suggestions on alternatives for things I haven't bought yet.

Cosmetic
I happen to like black-on-black, so I won't be adding metallic or carbon fiber doodads anywhere, aside from replacing badges the car came with (and I won't be replacing all of those).
  • Remove stock spoiler (link)
  • Remove rear wiper arm and spray nozzle (link)
  • Remove "H" badges (link)
  • Tinted windows: 35% front/35% back ($150)
  • Silver vent rings (link, $11)
  • 2005 style headlights (Ebay, $366)
  • 2005 style taillights (Skeletron, $130)
  • Tinted taillights (local body shop, $150)
  • New 2005 steering wheel
  • New 2005 interior door handles
  • Custom badge on steering wheel
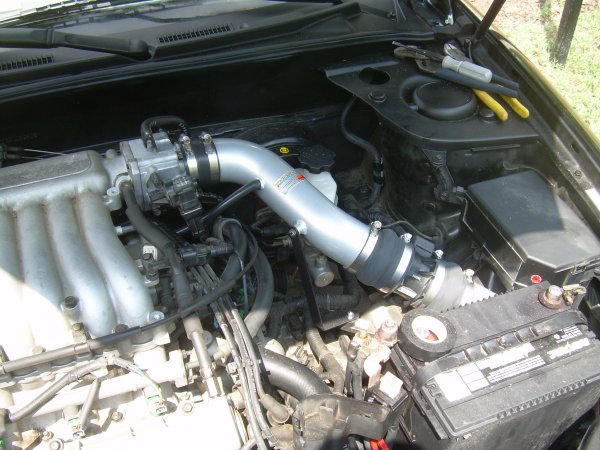
  • Remove plastic from engine compartment
  • Have entire car repainted ($5800)
  • 2005/2006 stock front bumper cover w/ fog lights, etc. (Amazon for bumper, Hyundai for misc. parts, $331, +approx. $600 for paint & bodywork: $931 total)
  • Aluminum billet grill (Grille technologies, $108)
Engine

  • K&R 69 Series Typhoon Kit (CAI) (link, $265)
  • Throttle body coolant by-pass
  • 60mm big-bore throttle body ($175)
  • 60mm big-bore intake manifold (approx $175 incl. machining)
  • Importshark 2.7L Headers (link $260)
  • Borla cat-back exhaust (link, $600, + $80 installation) (replaced with OEM exhaust in 2023, to cut down on exhaust noise)
  • MagnaFlow 94105 catalytic converter ($65 + $90 installation) (replaced with OEM catalytic converter in 2017, to cut down on exhaust noise)
  • Replace upper and lower oil pan gaskets, and fabricate a hose that is no longer available (OEM, $840)
Suspension

  • Arkspeedracing DT-P Coilover System (link, $1200) (2010-2022)
  • BC Racing BR-SERIES coilovers (link $1245; plus sway bar links, rear struts, left drive axle, alignment, and labor $2274: $3519 total)
  • RRM front and rear strut bars (Nolfol, $160)
  • XXR 522 17x8" wheels, +48 offset, powder coated black ($525)
  • New center caps for XXR 522 wheels ($50)
  • Stainless steel brake lines (Techna-Fit, $99)
  • New rear calipers, pads, and rotors (OEM, $850)
Electrical
  • Pioneer DEHX9600BHS CD Receiver (Amazon, $188)
  • Rockford Fosgate P2D2-10 Punch P2 DVC 2 Ohm 10-Inch 300 Watts RMS 600 Watts Peak Subwoofer (Amazon, $84)
  • Replace stock antenna with retractable power antenna (link, $65)
  • Wire power antenna into TCS switch, (link, $14)
  • Korean multigauge (link, $110)
  • Relocate idiotic center brake light (Ebay, $10)
  • Hikari LED low beam (H7) headlight bulbs, CREE XHP50, 9600lm, 6000K "Cool White" (Amazon, $70)
  • Hikari LED fog lamp (9006) headlight bulbs, CREE XHP50, 9600lm, 6000K "Cool White" (Amazon, $70)
  • Red LED cabin lights (link, $13)
  • Red LED glove compartment light (Diode Dynamics)
  • White LED license plate lights (Diode Dynamics)
  • 2-way LED front turn signal bulbs (link, $114)
  • Red LED footwell lights (Diode Dynamics)
Quality of life
The passenger cup was the first mod I did!
  • Passenger side cup holder (link, $28)
  • Remove door chime (link)
  • Noico 80 Mil Foil & Butyl Mat Sound Dampening Insulation (Amazon, $35)
  • New leather upholstery (Costco/Roadwire, installed by Car Toyz in Richmond, VA, $1,369)
  • Relocate GPS mount (Sugru, $16)
  • Remove rear seats and stock deck, construct and carpet new rear deck
 
#5 · (Edited)
  • Remove "H" badges (link) DONE


And so it begins.

There is a fairly obvious "H" outline left on the paint. This is (I believe) because the paint under the "H" is fresh and new, while the paint around it has been subjected to eight Virginia summers and winters. It could probably be buffed out. I may or may not bother. It depends on how much it bugs me.

Eventually, the holes in the front will be filled and painted, along with the rest of the car. The back will get a custom "T" logo from ForceFedFlesh. Or I may just have those filled when I have the holes from the spoiler filled. As cool as ForceFedFlesh's badges are -- they are works of art, they really are -- I think I like the plain look in the back. I might buy one of his badges just to have it, and not even put it on the car.

Fun fact! I did not know until I took these photos that the black lettering on the back of my car saying "Tiburon" and "GT V" (the "6" is red) glowed like the sun when hit by a bright light (the flash on my camera, in this case). Nifty!

I don't plan to replace or remove that lettering, by the way. I have always liked the black lettering on the back, and the red "6".
 
#6 · (Edited)
I cleaned the engine compartment.


The K&R intake arrived today. I am planning to hold off on installing it until I get the big bore throttle body. I do not like disassembling and reassembling things over and over. I might even wait until I get a ported and polished intake manifold and phenolic spacer, but I am not sure about that. It depends on what price I can get on an intake manifold set. If it costs too much, I won't be doing that.
 
#8 · (Edited)
Removing the spoiler

Removing the spoiler and installing an idiotic third brake light. This is not really a DIY, but these are photos of each step.


Take a look at the screws holding in the windshield wiper motor -- two of the three screws were already completely loose. It was being held in with one screw!

I was going to disconnect the wiper pump, but that wound up being a nuisance, so I just pulled the fuse for the rear wipers.

Where the spoiler had been attached to the car, it rubbed lines through the paint and has started to rust.

The nylon plugs are a temporary measure. Sealing the holes properly and repainting the hatch would be $800, while doing that and the whole car would be $3500. Chances are, I will get the hatch painted first, since doing just that is so much cheaper.

Hooray! I wish I'd done this eight years ago.

I really like the LED brake light (I mean, I'd rather not have it at all, but if I have to have it, I like this one). So I plan to order another so that I have a spare when these burn out. About of the third of the stock LEDs in the spoiler had stopped working.
 
#12 · (Edited)
vent rings and red cabin LEDs

I installed silver vent rings and the red LED dome lights. Everything looks good, although I wish the dome lights were a better match for the OEM orange/red LEDs.


Using the little magnets on the standoffs is brilliant, by the way. if it were me, I would have just used contact cement or something like that.
 
#15 · (Edited)
headlights and grill

I replaced the headlights and grill today. I considered painting the grill black. I may still decide to do that.

I thought it was particularly handy that the Hyundai engineers provided a place to put my coffee cup while I was working.


I installed the grill and the HID low-beam bulbs at the same time.
 
#17 · (Edited)
I like where your car is going...keep it up :) The headlights look so much better. I remember when I put mine on...it's like night and day. I'd say keep the grill the way it is until you get more supporting mods...then you'll know whether or not you want to paint it. Let me know if/when you want to modify your headlights even further...I'll be happy to give you a hand.
 
#24 ·
You gonna do an upper intake manifold next to get rid of the bottleneck after the larger throttle body? It'd be a huge power boost and a good combo mod for you.
I wouldn't mind, but that's expensive, and I need to cool off on how much I am spending on this for a while. But I keep finding bargains! :3_yummie:

The next thing I install will probably be the Ark coilovers (which I hope will arrive in the next week or two). After that, it's probably the exhaust, because the most expensive parts for that have already been purchased. After that, I plan to work on the brakes, but that's a chunk of money, so it will need to wait a while.
 
#23 · (Edited)
Re: cold air intake and throttle body

A few notes on the K&N cold air intake and the 60mm throttle body:

I hadn't actually intended to install a cold air intake. I had intended to install a short ram intake. But once I got into it, I figured, what the hell, why not? Hopefully I won't destroy my engine the next time it rains.

The lawn people came by and did their thing while I was in the middle of the CAI installation. I didn't blame them -- they were just doing their job, and they did try to skirt me as much as possible, not that it helped. I took photos of them because it struck me funny.

This whole process took about seven hours, and I was completely exhausted and soaked with sweat by the end of it. I drank two cups of coffee and four liters of soda while working on this.

The new throttle seems more responsive than the old one, and the engine seems a little louder. I am not sure if that's my imagination or not, but I suppose I may as well enjoy it, either way.
 
#25 ·
You can do brakes fairly reasonably - I paid 370 for my setup, and it's way better than stock. Drilled and slotted with stoptech pads - since you do all your installs yourself it should be just the 370, upgrade the lines later. It'll make a world of difference to at least do the rotors and pads.

I like your plans though, keep up the good work!
 
#26 · (Edited)
Removing the steering wheel badge

Removing the steering wheel badge.


The left side torx screw refused to come out. I eventually stripped it, trying. I had to drill it out and use a screw extractor (what lots of people, myself included, call an "easy out") to get the bolt out. Then of course I needed to clean up all the metal shavings. I was very careful to get everything out. The last thing I want is a malfunctioning airbag (well, maybe not the last thing... but you know what I mean).

I ordered a new torx screw from the Hyundai dealer. It's [STRIKE]less than a dollar[/STRIKE] (make that "less than $20"), but it's a bizarre screw. I couldn't find anything else like it at the hardware store.

Other than that, this was very simple.
 
#31 ·
Definitely coming along very well, I see.
I liked the headlights and interior lighting as it was a dramatic difference.
Must feel good to hear that air being sucked in at start-up.
Happy Modding Indeed. :3_bier: