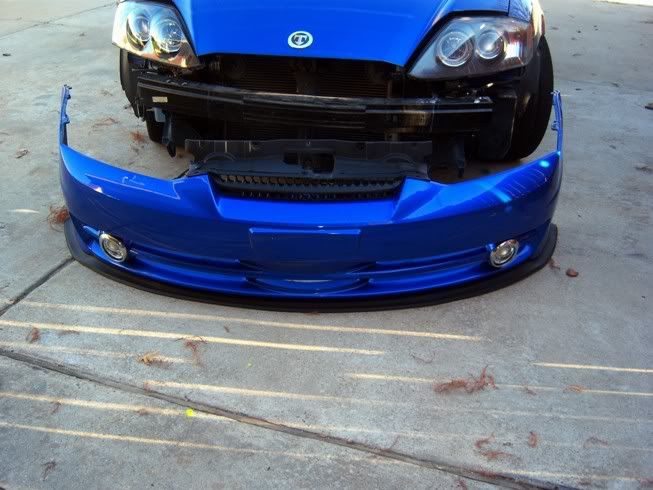
Well, here it is...
Took me about 30 minutes to do, and that was with the car on the ground. It would probably be easier if it were jacked up some and on jack stands...
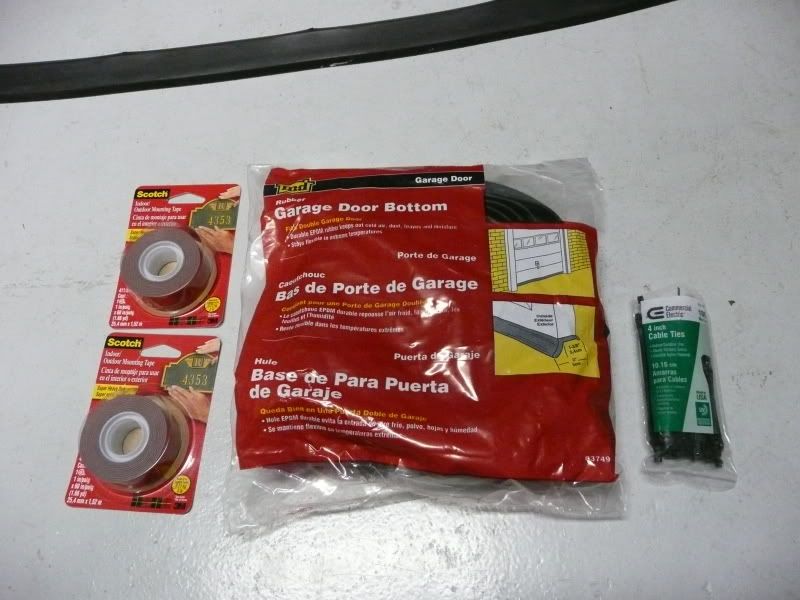
Tools and Materials:
10mm Socket and Ratchet
Pointy Screwdriver (Or drill)
Wire Cutters
Scissors
Zip Ties
3M Outdoor double sided tape
Garage Door Bottom (I got it in a 12 foot roll. Only need about 7-8 feet)
Directions:
![Image]()
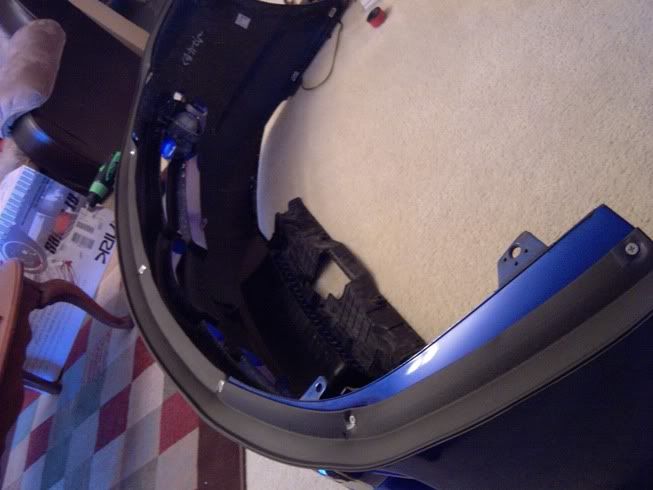
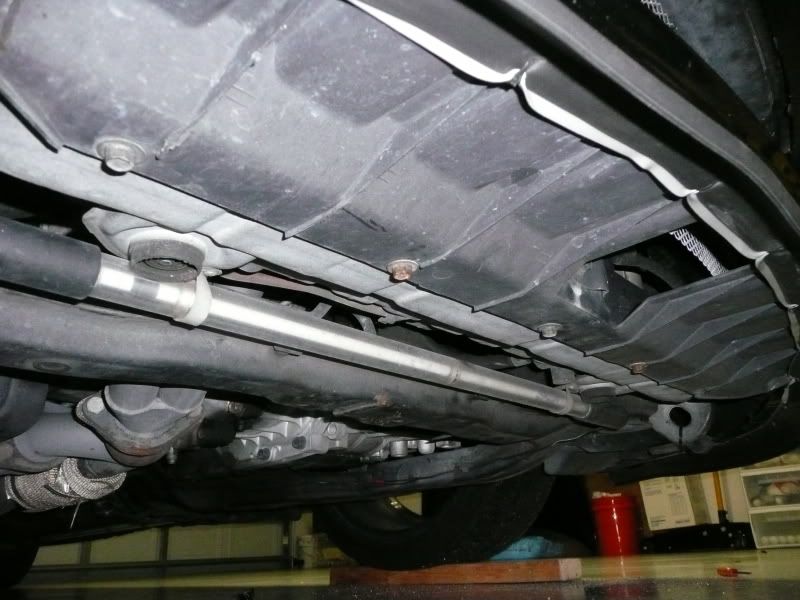
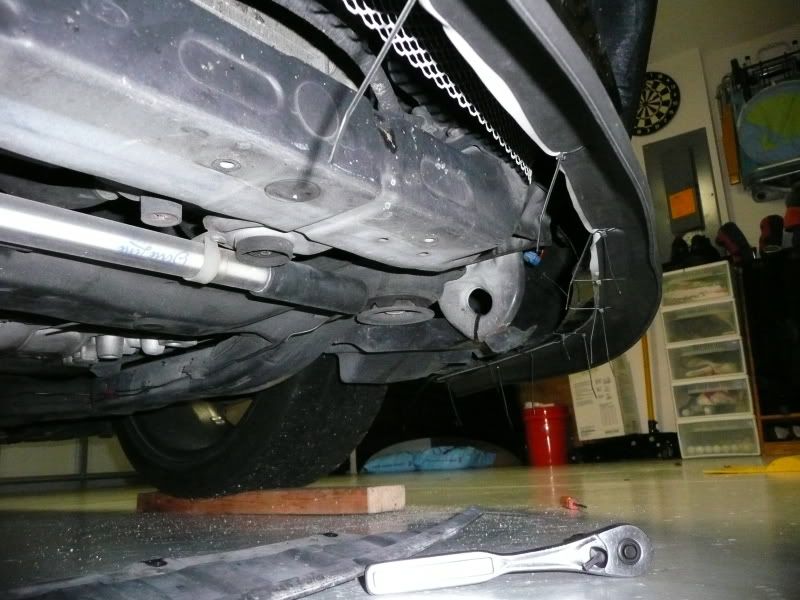
First, you'll need to remove the radiator guard under the car. You can do this by taking out the 5 bolts pictured below.
![Image]()
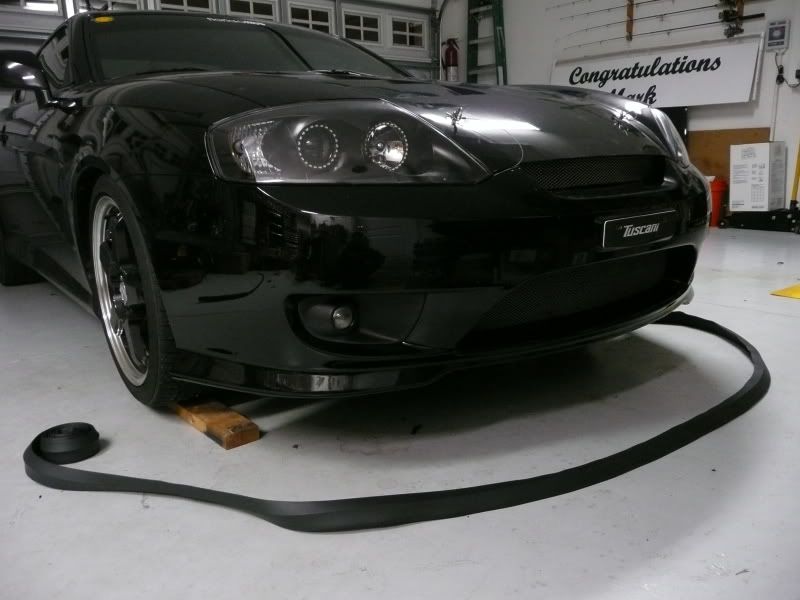
Once you have that off, lay out the Garage Door Bottom along the bumper on the ground.
![Image]()
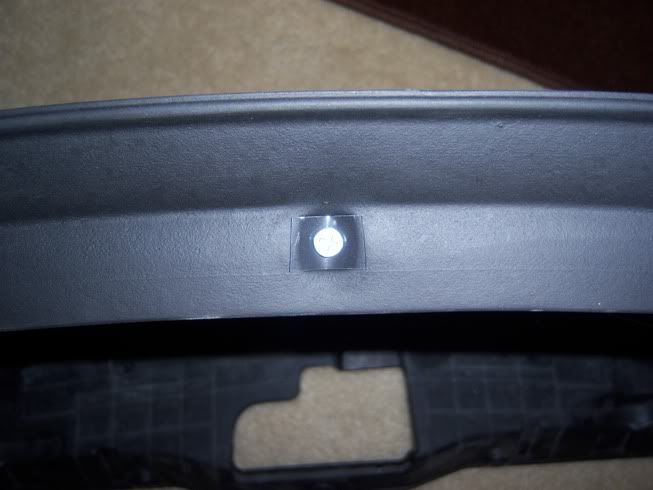
Take the double sided tape, and stick it along the edge of the garage door bottom. I left a little gap from the edge so it would be less noticeable...
![Image]()
![Image]()
Now, hold the lip up to the bumper, and decide where you'd like it to be placed. Whether you like it recessed in a little, or on the edge. I went for a middle ground with it...
![Image]()
Next, stick it onto the bottom of the bumper. I found out that once you stick it on the bumper, it doesn't like to be taken back off. So get it right the first time
![Image]()
Next, keep unrolling the tape along the garage door bottom as you go around the bumper.
![Image]()
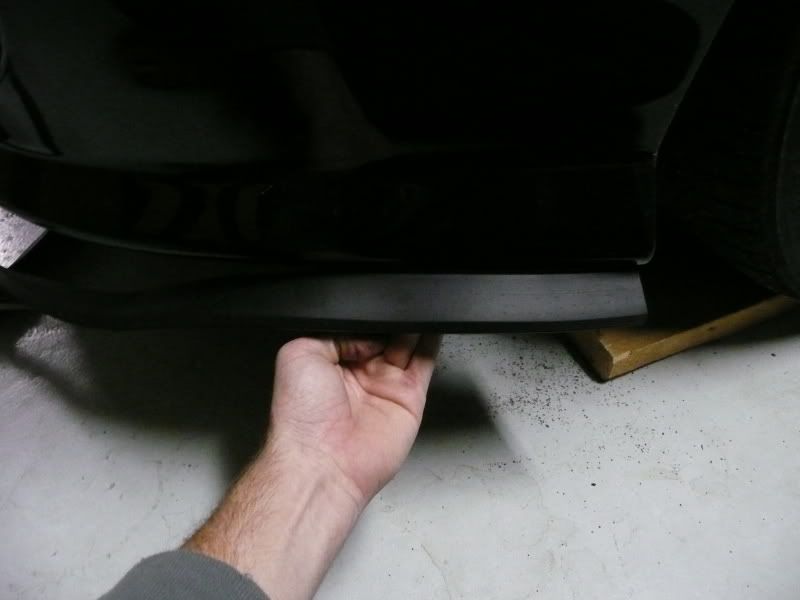
Then, work your way around the bumper. Make sure to take your time, checking the spacing to make sure it's even. If it's not, it WILL be noticeable. When going around any curves, make sure to push the lip into the corners so it sits flush with the bottom of the bumper. If you don't, you'll have a hard time getting it to curve with the bumper.
![Image]()
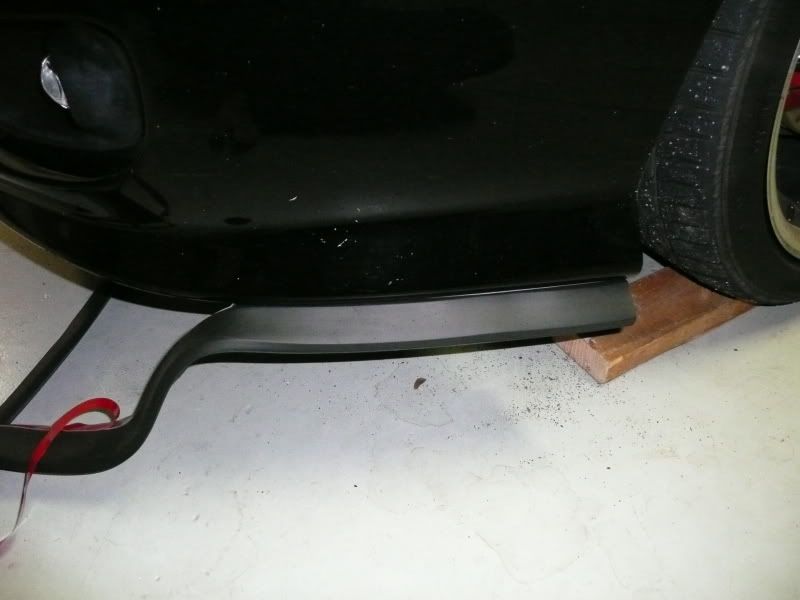
Then, once you worked your way all the way around, using scissors, cut off the excess garage door bottom.
![Image]()
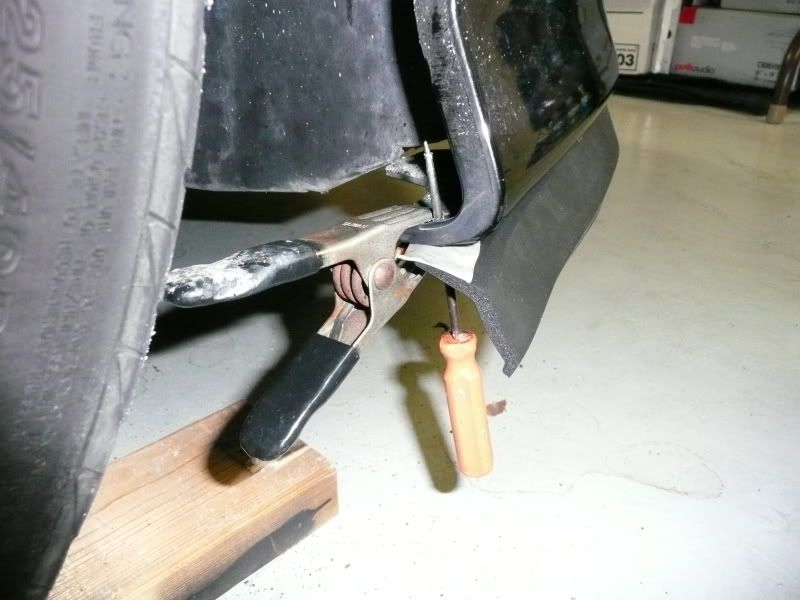
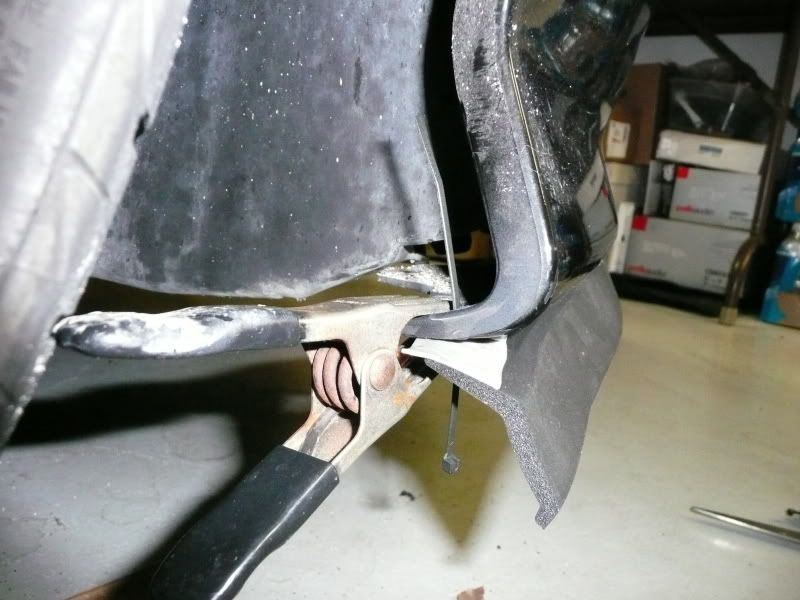
Now, I clamped the edges to make sure the lip wouldn't start to come off while I secured it in place. Then, I took my pointed screwdriver and just pushed it through the lip, and the bottom of the bumper.
![Image]()
Once I did that, I just fed through a zip tie.
![Image]()
After that, pull the zip tie tight, and make sure it is secured as this will be the main thing holding the lip on. Once you've done that, move down about 4-5 inches, and make another hole, feed through the ziptie, and pull it tight. Repeat this as you work your way around the bumper.
![Image]()
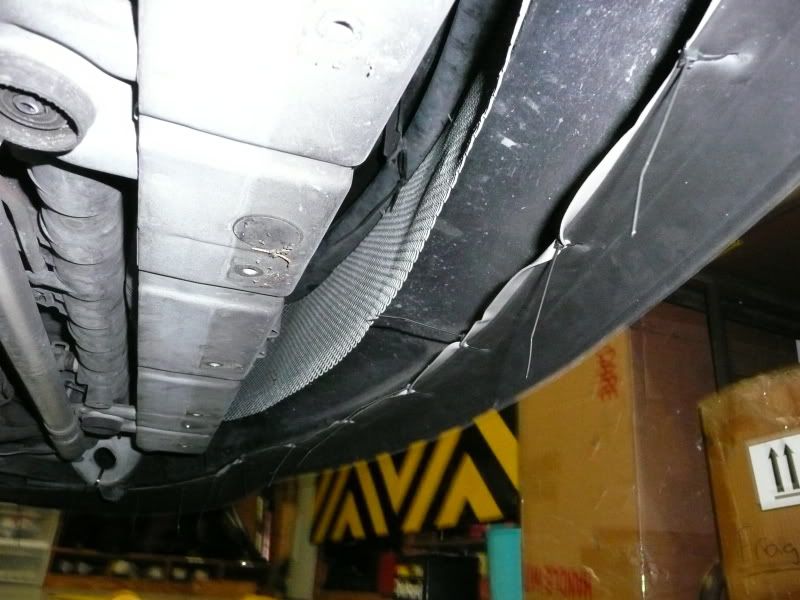
When you get to a corner or spot where you have to keep the lip pressed up against the bumper, use a few zip ties to make sure it stays tight along the bottom of the bumper.
![Image]()
![Image]()
Now, take those wire cutters and snip off the extra stems on the zip ties to clean it up a bit...
![Image]()
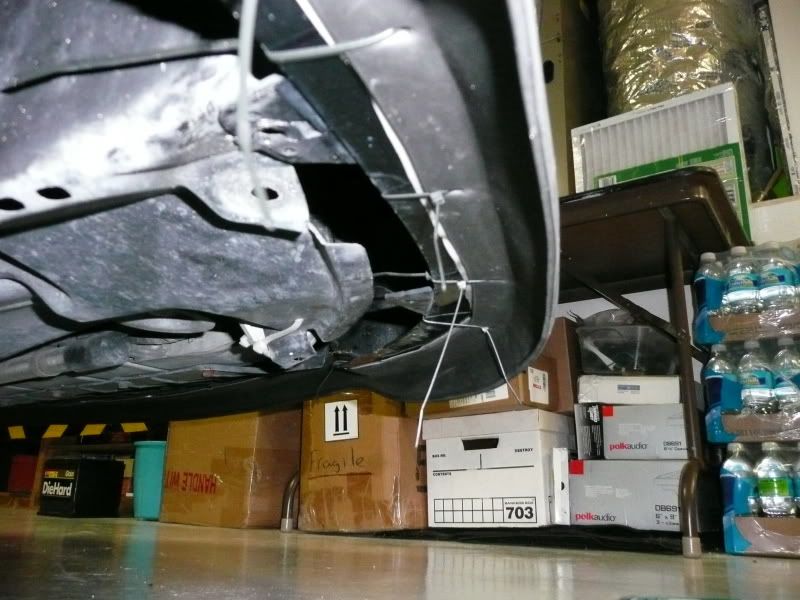
Now, replace your radiator guard that you took off in the beginning by putting those 5 bolts back in, and you're all done!
![Image]()
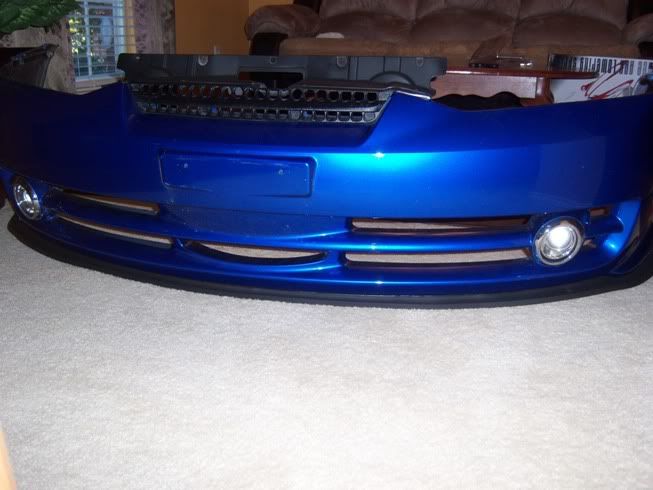
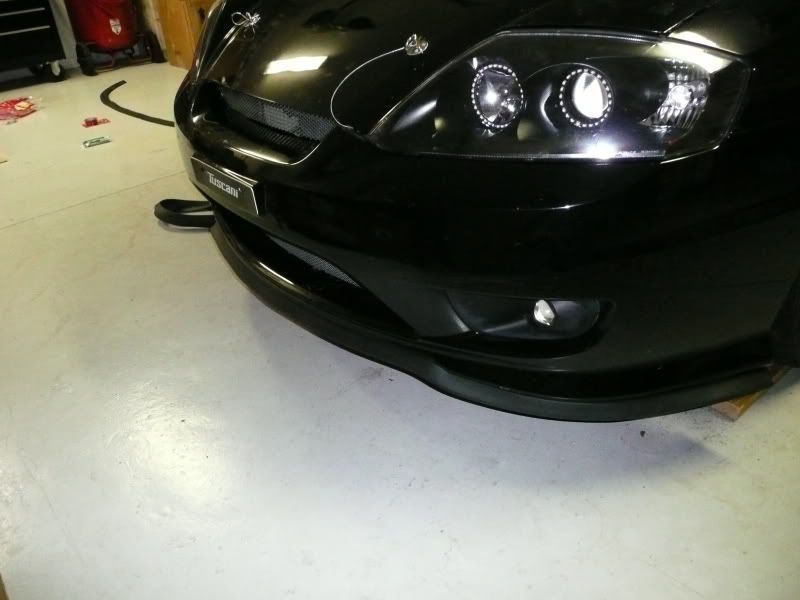
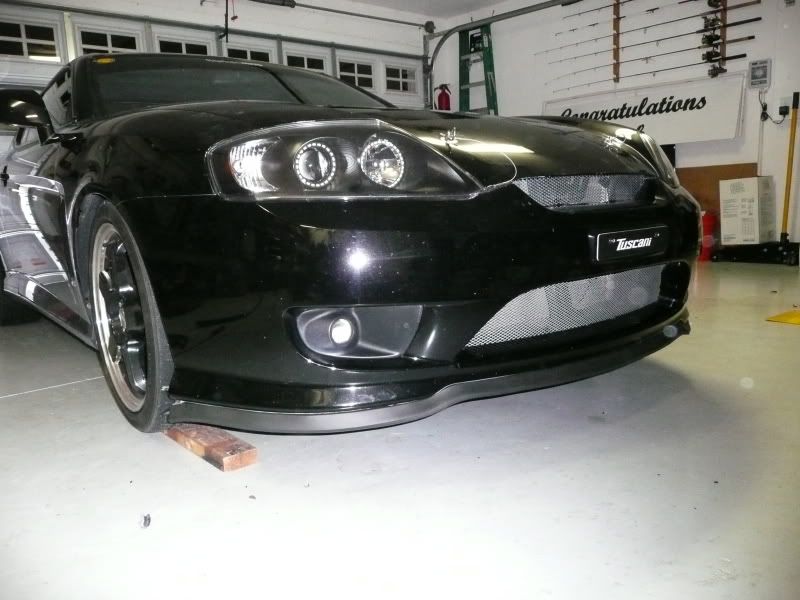
Pictures of the final product...
![Image]()
Oh, and for all the haters, don't bother posting. Just gtfo. I don't want your bullshlt cluttering up my thread.
Took me about 30 minutes to do, and that was with the car on the ground. It would probably be easier if it were jacked up some and on jack stands...
Tools and Materials:
10mm Socket and Ratchet
Pointy Screwdriver (Or drill)
Wire Cutters
Scissors
Zip Ties
3M Outdoor double sided tape
Garage Door Bottom (I got it in a 12 foot roll. Only need about 7-8 feet)
Directions:
First, you'll need to remove the radiator guard under the car. You can do this by taking out the 5 bolts pictured below.
Once you have that off, lay out the Garage Door Bottom along the bumper on the ground.
Take the double sided tape, and stick it along the edge of the garage door bottom. I left a little gap from the edge so it would be less noticeable...
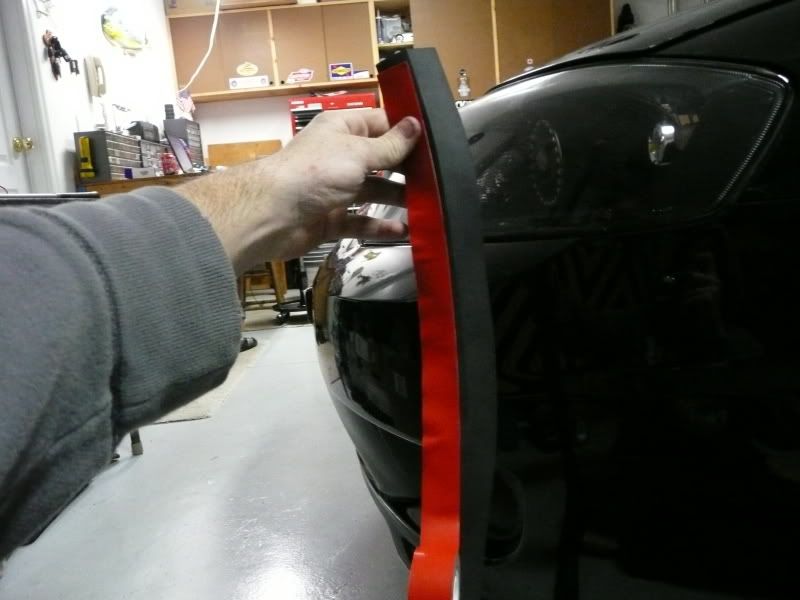
Now, hold the lip up to the bumper, and decide where you'd like it to be placed. Whether you like it recessed in a little, or on the edge. I went for a middle ground with it...
Next, stick it onto the bottom of the bumper. I found out that once you stick it on the bumper, it doesn't like to be taken back off. So get it right the first time
Next, keep unrolling the tape along the garage door bottom as you go around the bumper.

Then, work your way around the bumper. Make sure to take your time, checking the spacing to make sure it's even. If it's not, it WILL be noticeable. When going around any curves, make sure to push the lip into the corners so it sits flush with the bottom of the bumper. If you don't, you'll have a hard time getting it to curve with the bumper.
Then, once you worked your way all the way around, using scissors, cut off the excess garage door bottom.
Now, I clamped the edges to make sure the lip wouldn't start to come off while I secured it in place. Then, I took my pointed screwdriver and just pushed it through the lip, and the bottom of the bumper.
Once I did that, I just fed through a zip tie.
After that, pull the zip tie tight, and make sure it is secured as this will be the main thing holding the lip on. Once you've done that, move down about 4-5 inches, and make another hole, feed through the ziptie, and pull it tight. Repeat this as you work your way around the bumper.
When you get to a corner or spot where you have to keep the lip pressed up against the bumper, use a few zip ties to make sure it stays tight along the bottom of the bumper.
Now, take those wire cutters and snip off the extra stems on the zip ties to clean it up a bit...
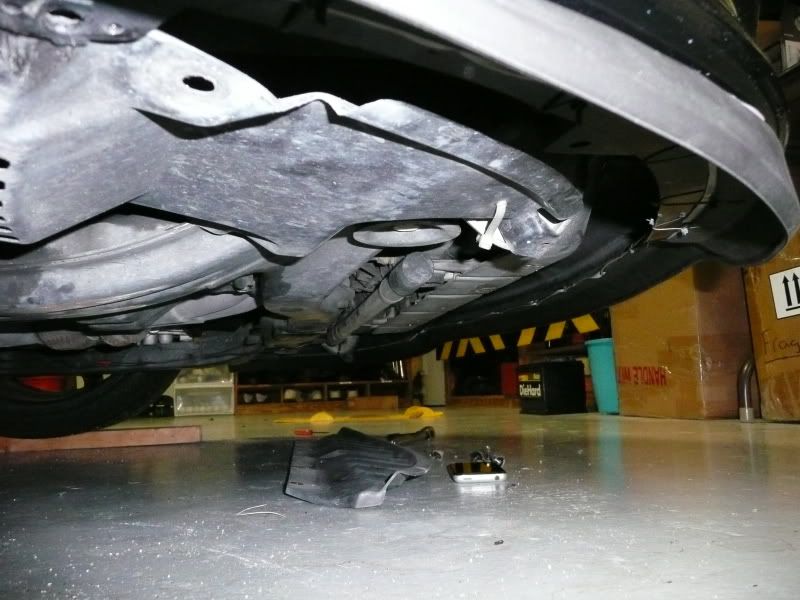
Now, replace your radiator guard that you took off in the beginning by putting those 5 bolts back in, and you're all done!
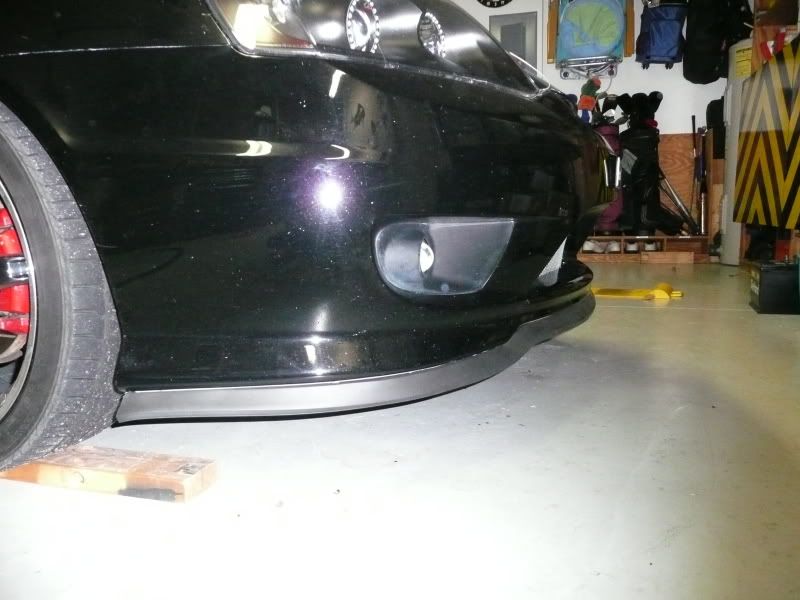
Pictures of the final product...

Oh, and for all the haters, don't bother posting. Just gtfo. I don't want your bullshlt cluttering up my thread.