This is a DIY for adding an aftermarket subwoofer and maintaining the stock look of the Infinity enclosure. I would not recommend using the stock amp for an aftermarket sub, as it only puts out something like 40 watts to the sub. I chose a Kicker CompVR, and it’s pretty damn impressive for an 8” sub in a plastic enclosure. If you need wiring help see my Infinity wiring diagram.
Materials:
-Dremel with cutting blades & sanding wheel, or some other small saw & sandpaper
-Silicone
-Flathead & phillips screwdriver
-10mm socket with extension
01. Remove the stock subwoofer enclosure from the hatch (3 bolts).
![Image]()
02. Take apart enclosure. The front carpet cover should pull right off. Use a flathead screwdriver to pop off the grill. Use the 10mm socket with extension for the bolt going through the back of the enclosure into the back of the sub. Then a phillips head for the screws securing the front of the sub.
![Image]()
03. Remove the stock wiring and run your wire through the stock grommet
![Image]()
![Image]()
04. Compare the mounting depth of the stock sub to the aftermarket one and make a note of how much additional mounting depth the new one requires.
![Image]()
05. Use your dremel with a cutting blade to cut the plastic tube that sticks into the enclosure, about 2-3 inches in from the base, or however deep you need for your sub’s mounting depth. If you have a sub with the same or smaller mounting depth than the stock sub, which is unlikely because it’s extremely shallow, you can skip this and the next few steps (just make sure you seal the bolt hole with silicone).
![Image]()
![Image]()
06. Now use the dremel’s sanding attachment to shave off the edges sticking out from the cone you just cut out.
![Image]()
07. Cut the cone down so it is just long enough to fill in the open tube left in the enclosure.
![Image]()
08. Insert the tip into the enclosure from the back, checking for a snug fit. Make adjustments if necessary with the dremel and then proceed to glue it in place.
![Image]()
![Image]()
![Image]()
09. Use silicone on the cut area from front and back to ensure an airtight seal. Don’t be afraid to use too much, it needs to be 100% airtight, and you won’t see this area. So slather it on. Make sure to get the small hole in the middle from the bolt and around the wire grommet as well.
![Image]()
![Image]()
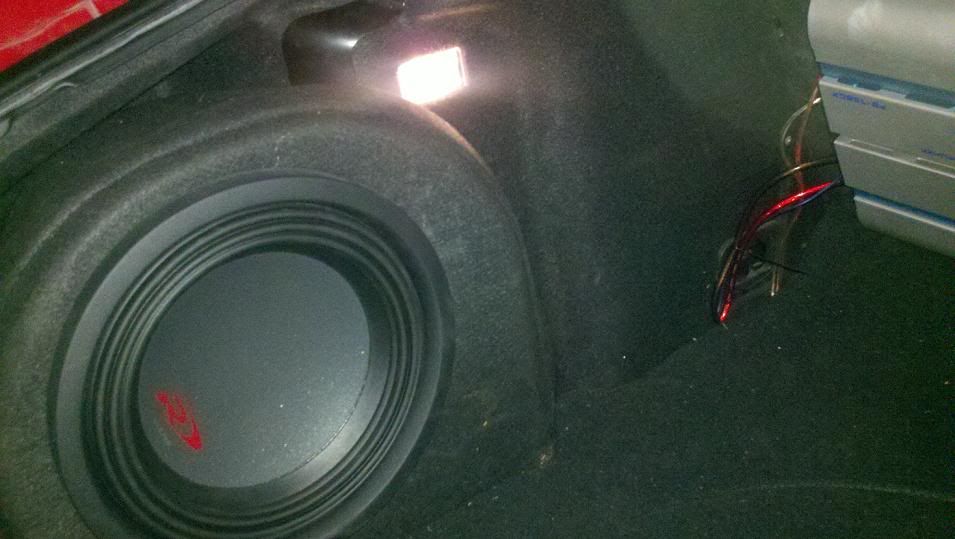
09. Stuff the enclosure with polyfill if you like, it’s just a trick to make the sub act as though the enclosure is larger, then wire up your sub and put it in place. Screw it in around the edges.
![Image]()
10. Most likely the surround of the aftermarket sub would hit the stock Infinity grill, so it is unusable. Put the carpet cover back on the enclosure, and you’re all set. I put a ring of grey felt around the sub to match my amp, and used an aftermarket Kicker grill.
![Image]()
![Image]()
And the finished product:
![Image]()
![Image]()
Easy as that. Any comments/suggestions welcome. See my sig for other DIYs.
Materials:
-Dremel with cutting blades & sanding wheel, or some other small saw & sandpaper
-Silicone
-Flathead & phillips screwdriver
-10mm socket with extension
01. Remove the stock subwoofer enclosure from the hatch (3 bolts).

02. Take apart enclosure. The front carpet cover should pull right off. Use a flathead screwdriver to pop off the grill. Use the 10mm socket with extension for the bolt going through the back of the enclosure into the back of the sub. Then a phillips head for the screws securing the front of the sub.

03. Remove the stock wiring and run your wire through the stock grommet


04. Compare the mounting depth of the stock sub to the aftermarket one and make a note of how much additional mounting depth the new one requires.

05. Use your dremel with a cutting blade to cut the plastic tube that sticks into the enclosure, about 2-3 inches in from the base, or however deep you need for your sub’s mounting depth. If you have a sub with the same or smaller mounting depth than the stock sub, which is unlikely because it’s extremely shallow, you can skip this and the next few steps (just make sure you seal the bolt hole with silicone).


06. Now use the dremel’s sanding attachment to shave off the edges sticking out from the cone you just cut out.

07. Cut the cone down so it is just long enough to fill in the open tube left in the enclosure.

08. Insert the tip into the enclosure from the back, checking for a snug fit. Make adjustments if necessary with the dremel and then proceed to glue it in place.


09. Use silicone on the cut area from front and back to ensure an airtight seal. Don’t be afraid to use too much, it needs to be 100% airtight, and you won’t see this area. So slather it on. Make sure to get the small hole in the middle from the bolt and around the wire grommet as well.


09. Stuff the enclosure with polyfill if you like, it’s just a trick to make the sub act as though the enclosure is larger, then wire up your sub and put it in place. Screw it in around the edges.

10. Most likely the surround of the aftermarket sub would hit the stock Infinity grill, so it is unusable. Put the carpet cover back on the enclosure, and you’re all set. I put a ring of grey felt around the sub to match my amp, and used an aftermarket Kicker grill.


And the finished product:


Easy as that. Any comments/suggestions welcome. See my sig for other DIYs.