

This DIY will describe a process to hook up your garage door opener to an OEM switch, which you can then install in your dashboard, for the cleanest possible garage door access!
NOTE: You have a two options where to hook it up. Your first option (which I used) is to the TCS switch location (if you don't have TCS), next to the dimmer switch on the left of the steering wheel. The second option is to the MIC switch, which I believe goes next to the foglight switch. Totally up to you. The key here is that the switch you use is a MOMENTARY switch (where you push it in, and it springs back out), not an on/off switch (where you push it in, its stays in; you push it again, and it pops back out).
What you'll need:
OEM momentary switch (TCS or MIC)
6-pin wiring harness (I think dreamka4u or SFR sells these. See pictures below)
Basic wiring equipment (soldering supplies, splices, heat shrink, tape, a little extra wire, whatever)
Your garage door opener!
Here's the switch, with its prong layout you'll need to know:
![Image]()
Here's what the wiring harness looks like:
![Image]()
NOTE: Your wires may be different colors than mine. Verify how the harness connects to the switch before you start doing any further work!
NOTE 2: If your wiring is short, you may need to splice in longer pieces of wire. I'm assuming you can do this without instruction.
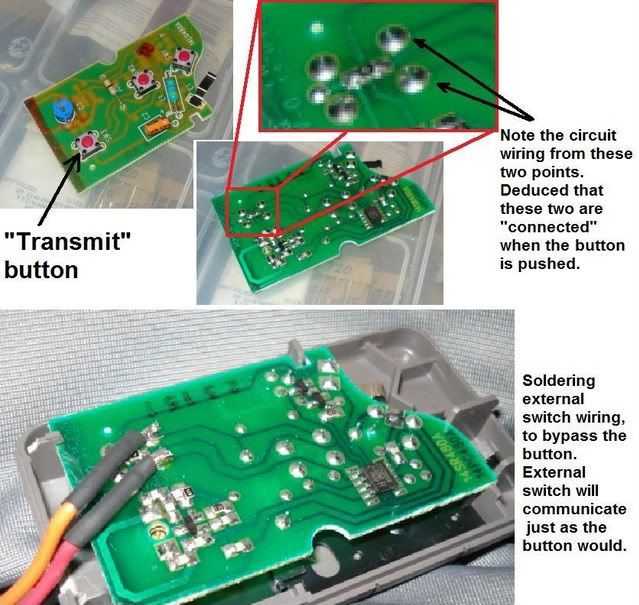
Now, get your garage door opener. This will vary based on your openers -- not all look the same, and you'll have to do some figuring-out of how it works!
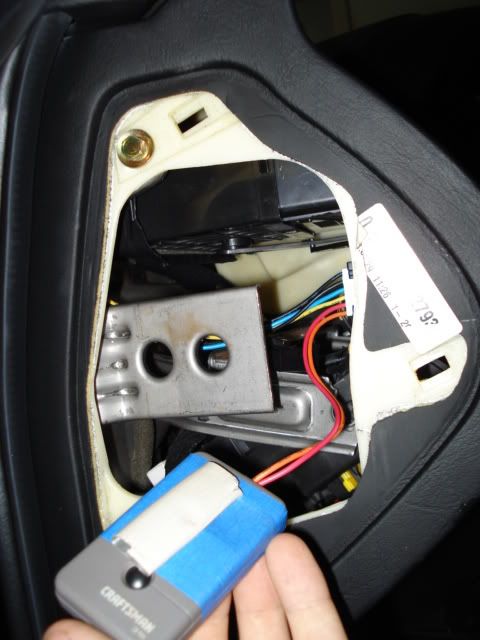
Your garage door opener, inside, should basically be a small circuit board with a switch on it. (Mine had three switches.) Take a close look at it, and figure out which internal-wiring ports are connected when you push the button to open the door. Solder the two "function" wires to these points. (In my case, the orange and red wires.) This will bypass the button on the circuit board, and will tell the board to send its signal to the garage door, when you push the switch instead of the button on the board.
![Image]()
Now, reassemble your opener (if you wish), cutting whatever notches/holes you need to for the wiring. Plug it into the switch, and go test it!!!
Assuming it works, now you're ready to begin the installation process.
If you're installing it at the TCS location on the left side of the dashboard, like I did:
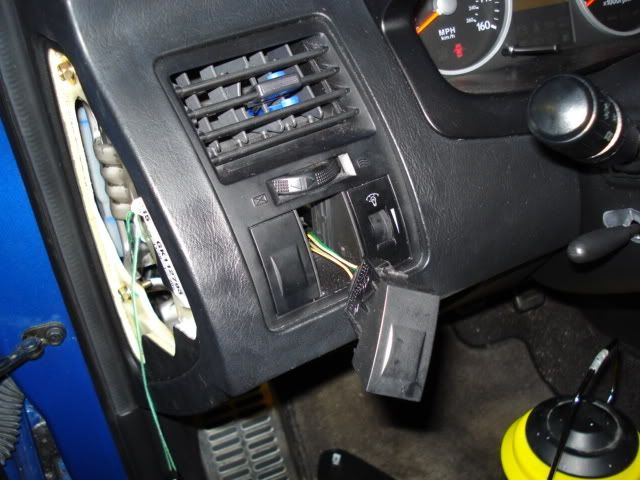
Remove the panel on the left side of the dashboard.
Remove the panel by the driver's knee area, where you access the fuses & OBD-II port.
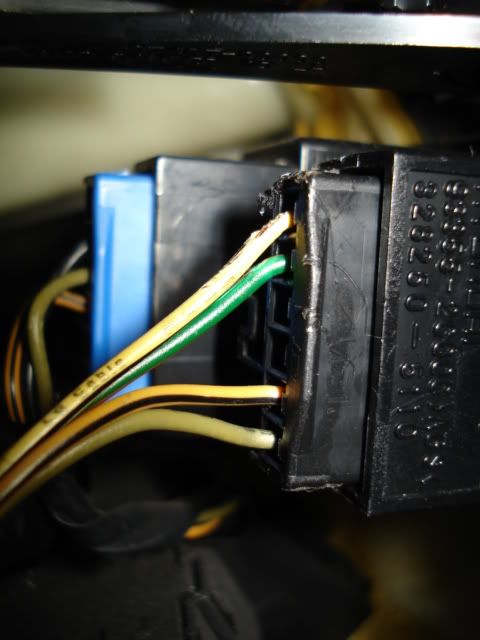
Looking inside the dashboard at the back of the dummy switches, you'll see that the middle dummy switch has wires plugged into it! Hyundai gave us a gift -- the wiring is active for the backlight illumination! More on this later.
![Image]()
Remove the middle dummy switch. You'll find this will likely be the most difficult part of this DIY. I fought with this switch for about a half hour before I finally got it out. There are two tabs you have to squeeze down to get it out ... trouble is, the top tab is in close proximity to the bottom of the vent, making it difficult to access. I finally found success pushing down on the top tab with a flathead screwdriver (from the left side access opening), and pushing firmly on the bottom tab (from the fuse area opening), and wiggling it up and down. What a pain! Don't forget to unhook the wire harness, of course.
![Image]()
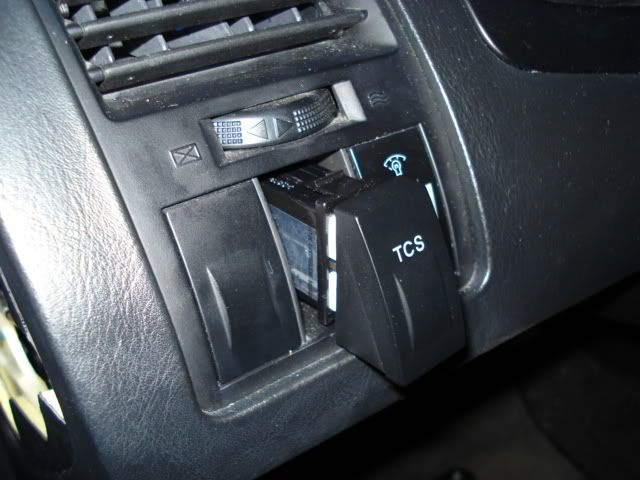
Pop in your TCS switch. You don't need to hook up the wire harness before you do so; access is still pretty good.
![Image]()
![Image]()
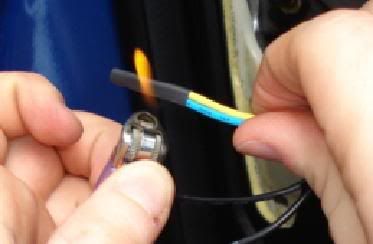
Let's go back your new wire harness, whose "function" wires you've soldered to your opener. You won't be using the on/off light wires, since there is no on/off light. Tape or heat-shrink these two wires together (the middle two -- blue & yellow, in my case), because you won't be needing them. This will get them out of the way.
![Image]()
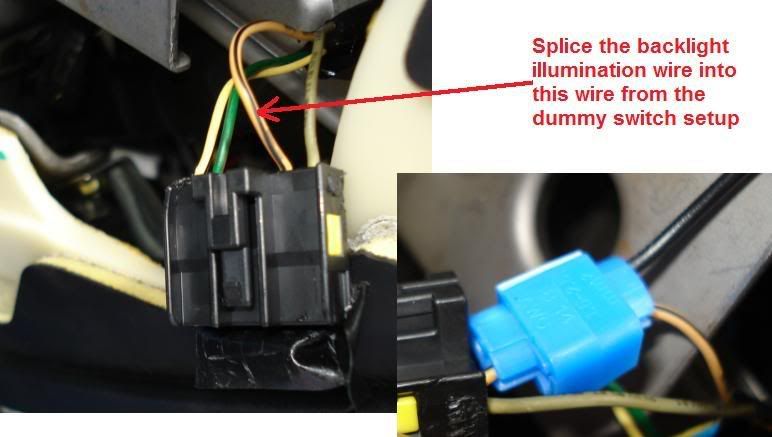
Next: Backlight illumination! Remember, Hyundai was nice and gave us a freebie. On the dummy switch's wire harness, the yellow wire with the black stripe is your backlight power. Take your TOP-most wire on your new harness (black, in my case), and splice it into this wire. (Splice, cut & solder, cut & tape, cut & cap, whatever you like.)
![Image]()
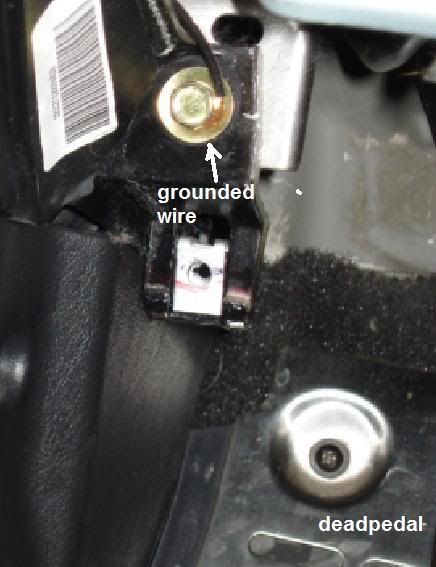
Now, take the wire just below that one on your new wire harness (also black, in my case), and find a good place to ground it. Best spot might be underneath an installed bolt somewhere. (In other words, find a non-critical bolt, back it off a few turns, expose the end of the wire, curl it in a loop, put it under the bolt head, and tighten the bolt back down.) I pulled down the bottom dash section, and grounded it at this location above the deadpedal:
![Image]()
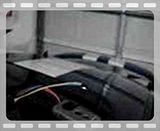
Now you're on the homestretch! All you've gotta do is find a place to mount your garage door opener. Keep it away from metal (will interfere with the antenna), and try to mount it as high inside the dashboard as possible. Thankfully, mine is very small and slim, so I simply taped it as high as I could on the side of the vent:
Ready to go in:
![Image]()
Mounted:
![Image]()
This is a handy spot, because if the battery ever dies, it's easy to get to, to replace it. (If you want to go the extra mile and wire full-time power to it, have fun with that.)
Close everything up, and you're done! The cleanest and slickest possible garage door opener switch installation! I absolutely love up ... roll up to my house, push the button in the dashboard, and Open Sesame!!
![Image]()
NOTE: You have a two options where to hook it up. Your first option (which I used) is to the TCS switch location (if you don't have TCS), next to the dimmer switch on the left of the steering wheel. The second option is to the MIC switch, which I believe goes next to the foglight switch. Totally up to you. The key here is that the switch you use is a MOMENTARY switch (where you push it in, and it springs back out), not an on/off switch (where you push it in, its stays in; you push it again, and it pops back out).
What you'll need:
OEM momentary switch (TCS or MIC)
6-pin wiring harness (I think dreamka4u or SFR sells these. See pictures below)
Basic wiring equipment (soldering supplies, splices, heat shrink, tape, a little extra wire, whatever)
Your garage door opener!
Here's the switch, with its prong layout you'll need to know:

Here's what the wiring harness looks like:
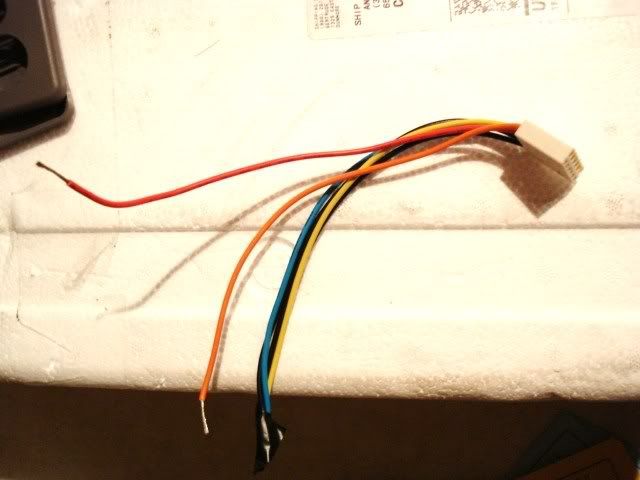
NOTE: Your wires may be different colors than mine. Verify how the harness connects to the switch before you start doing any further work!
NOTE 2: If your wiring is short, you may need to splice in longer pieces of wire. I'm assuming you can do this without instruction.
Now, get your garage door opener. This will vary based on your openers -- not all look the same, and you'll have to do some figuring-out of how it works!
Your garage door opener, inside, should basically be a small circuit board with a switch on it. (Mine had three switches.) Take a close look at it, and figure out which internal-wiring ports are connected when you push the button to open the door. Solder the two "function" wires to these points. (In my case, the orange and red wires.) This will bypass the button on the circuit board, and will tell the board to send its signal to the garage door, when you push the switch instead of the button on the board.
Now, reassemble your opener (if you wish), cutting whatever notches/holes you need to for the wiring. Plug it into the switch, and go test it!!!
Assuming it works, now you're ready to begin the installation process.
If you're installing it at the TCS location on the left side of the dashboard, like I did:
Remove the panel on the left side of the dashboard.
Remove the panel by the driver's knee area, where you access the fuses & OBD-II port.
Looking inside the dashboard at the back of the dummy switches, you'll see that the middle dummy switch has wires plugged into it! Hyundai gave us a gift -- the wiring is active for the backlight illumination! More on this later.
Remove the middle dummy switch. You'll find this will likely be the most difficult part of this DIY. I fought with this switch for about a half hour before I finally got it out. There are two tabs you have to squeeze down to get it out ... trouble is, the top tab is in close proximity to the bottom of the vent, making it difficult to access. I finally found success pushing down on the top tab with a flathead screwdriver (from the left side access opening), and pushing firmly on the bottom tab (from the fuse area opening), and wiggling it up and down. What a pain! Don't forget to unhook the wire harness, of course.
Pop in your TCS switch. You don't need to hook up the wire harness before you do so; access is still pretty good.

Let's go back your new wire harness, whose "function" wires you've soldered to your opener. You won't be using the on/off light wires, since there is no on/off light. Tape or heat-shrink these two wires together (the middle two -- blue & yellow, in my case), because you won't be needing them. This will get them out of the way.
Next: Backlight illumination! Remember, Hyundai was nice and gave us a freebie. On the dummy switch's wire harness, the yellow wire with the black stripe is your backlight power. Take your TOP-most wire on your new harness (black, in my case), and splice it into this wire. (Splice, cut & solder, cut & tape, cut & cap, whatever you like.)
Now, take the wire just below that one on your new wire harness (also black, in my case), and find a good place to ground it. Best spot might be underneath an installed bolt somewhere. (In other words, find a non-critical bolt, back it off a few turns, expose the end of the wire, curl it in a loop, put it under the bolt head, and tighten the bolt back down.) I pulled down the bottom dash section, and grounded it at this location above the deadpedal:
Now you're on the homestretch! All you've gotta do is find a place to mount your garage door opener. Keep it away from metal (will interfere with the antenna), and try to mount it as high inside the dashboard as possible. Thankfully, mine is very small and slim, so I simply taped it as high as I could on the side of the vent:
Ready to go in:
Mounted:

This is a handy spot, because if the battery ever dies, it's easy to get to, to replace it. (If you want to go the extra mile and wire full-time power to it, have fun with that.)
Close everything up, and you're done! The cleanest and slickest possible garage door opener switch installation! I absolutely love up ... roll up to my house, push the button in the dashboard, and Open Sesame!!


