

The following DIY will provide instructions to replace your interior door handles (the latch you pull to open the door). I was unable to find any specific DIYs for this process, only some “advice” given with text only. Although the process is not that difficult, I’m always more comfortable with detailed instructions (especially since it requires door panel removal), so I hope this will help out some of you.
(Note: some folks have posted that they replaced their handles without removing the door panel. I didn’t try it, but visually evaluating the access shows that it could prove difficult if possible at all. Removing the door panel is easy enough, so I recommend doing it this way.)
DIY Contents:
First post:
-- Before & After photos
-- Terminology
-- Tools you will need
-- Special note for screw removals
Second post:
-- Procedure for door panel removal
Third post:
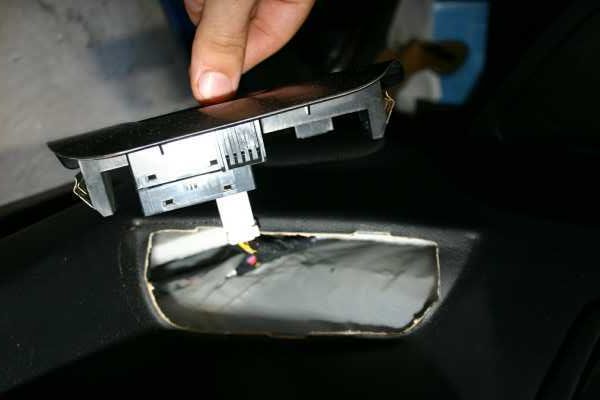
-- Procedure for latch handle assembly removal & replacement
-- Procedure for door panel reinstallation
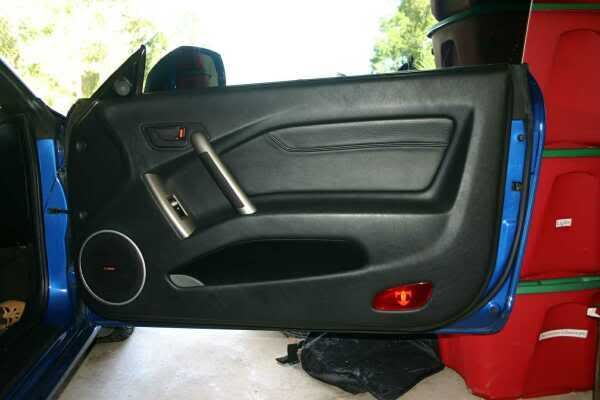
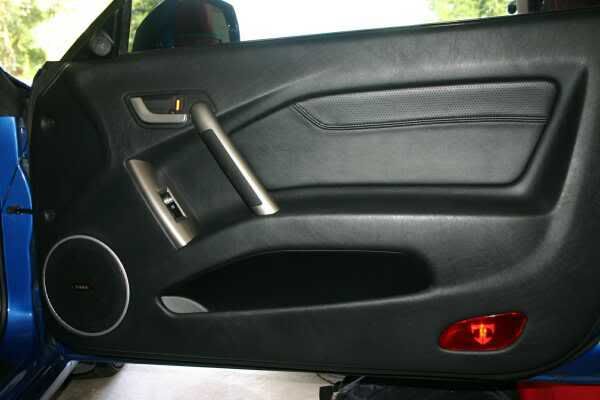
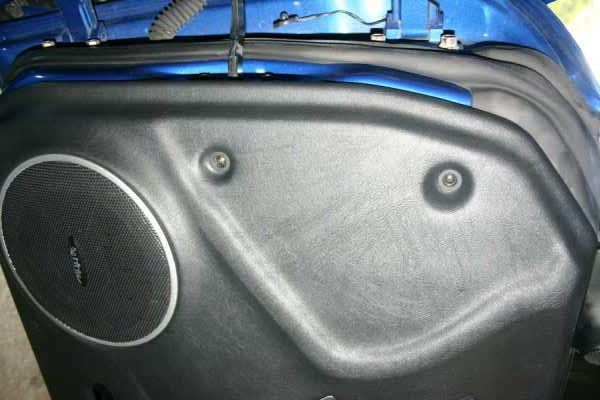
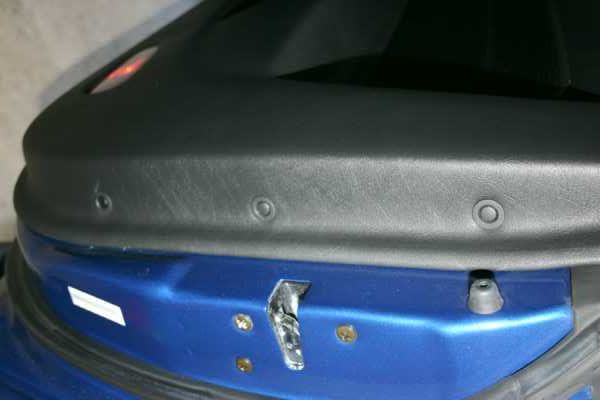
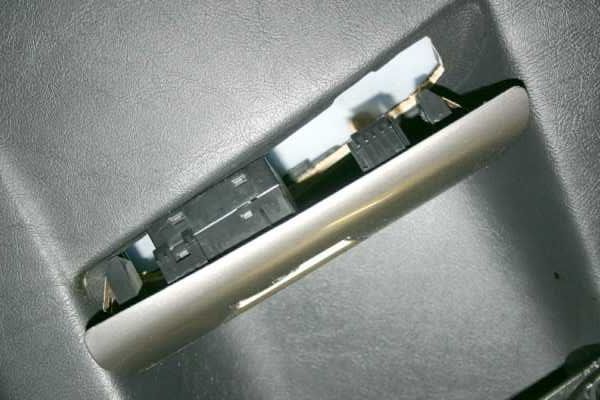
Before & After Photos
Note, I had already replaced the black grips with the F/L2 gunmetal grips. In this DIY, I’ll be replacing the black latch handles with the F/L2 gunmetal handles.
Before:
![Image]()
After:
![Image]()
![Image]()
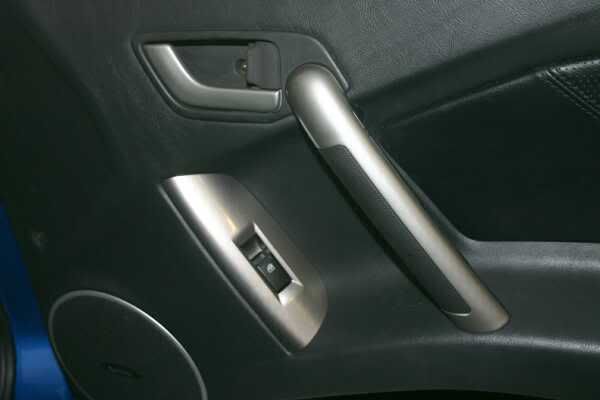
Terminology used in this DIY:
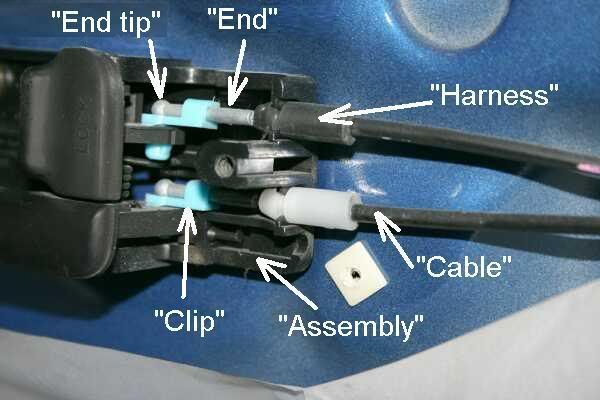
“Grip handle” or “Grip” – The long handle which you grab to pull the door closed.
“Latch handle” – The movable handle which you pull to unlatch & open the door.
“Latch handle backing” or “Catch” – The cup behind the latch handle, in which you insert your fingers to pull it open.
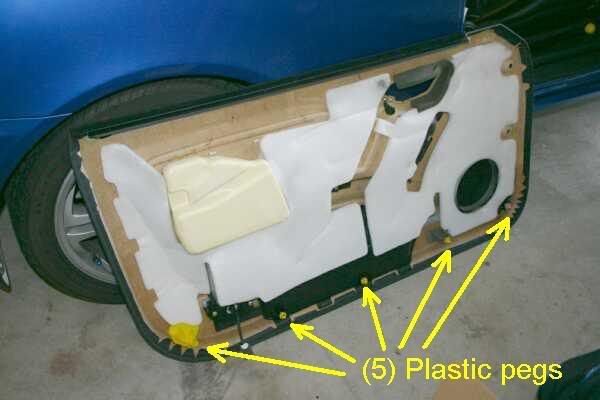
“Bushings” – the plastic hat-shaped pieces through which (5) of the door screws are installed.
“Caps” – the screw head covers for the (3) screws along back edge of door.
(Note: Handle assembly-specific terminology will be reviewed in the third post.)
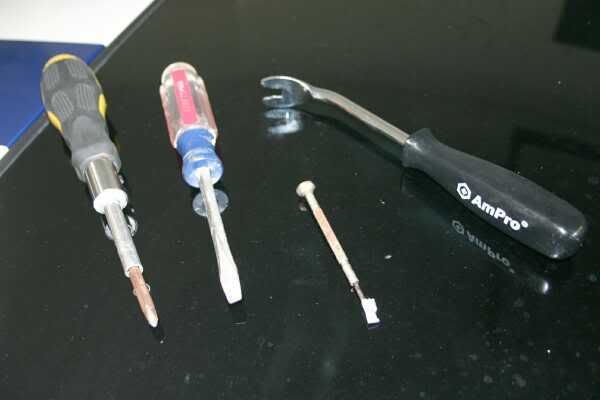
Tools you will need:
-- Flathead screwdriver
-- Tiny flathead screwdriver
-- Philips head screwdriver (magnetic optional, but will help)
-- Door upholstery removal tool (optional but worth it. ~$6 at auto parts store.)
-- Paper & pen for screw retention sketch
![Image]()
(Note, my tiny screwdriver has duct tape on the tip to protect the car's hardware)
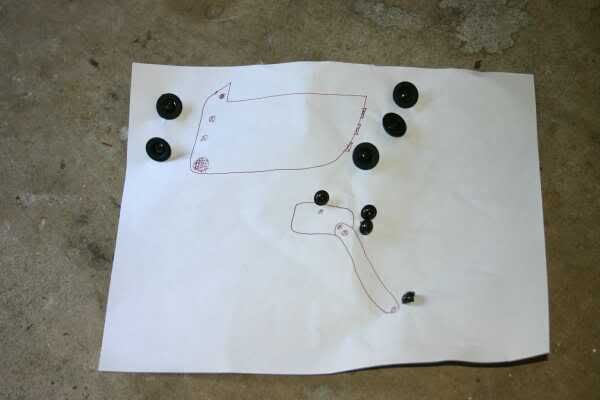
Special Note for screw removals:
I find it’s often easy to lose track of screws, or remember which screw goes where. I recommend using your pen & paper to draw a sketch of the door and handle area, showing the screw locations. Then, when you remove each screw, pierce the paper with the screw near the sketched location. Here is mine, to show you what I mean:
![Image]()
--End of first post--
(Note: some folks have posted that they replaced their handles without removing the door panel. I didn’t try it, but visually evaluating the access shows that it could prove difficult if possible at all. Removing the door panel is easy enough, so I recommend doing it this way.)
DIY Contents:
First post:
-- Before & After photos
-- Terminology
-- Tools you will need
-- Special note for screw removals
Second post:
-- Procedure for door panel removal
Third post:
-- Procedure for latch handle assembly removal & replacement
-- Procedure for door panel reinstallation
Before & After Photos
Note, I had already replaced the black grips with the F/L2 gunmetal grips. In this DIY, I’ll be replacing the black latch handles with the F/L2 gunmetal handles.
Before:
After:
Terminology used in this DIY:
“Grip handle” or “Grip” – The long handle which you grab to pull the door closed.
“Latch handle” – The movable handle which you pull to unlatch & open the door.
“Latch handle backing” or “Catch” – The cup behind the latch handle, in which you insert your fingers to pull it open.
“Bushings” – the plastic hat-shaped pieces through which (5) of the door screws are installed.
“Caps” – the screw head covers for the (3) screws along back edge of door.
(Note: Handle assembly-specific terminology will be reviewed in the third post.)
Tools you will need:
-- Flathead screwdriver
-- Tiny flathead screwdriver
-- Philips head screwdriver (magnetic optional, but will help)
-- Door upholstery removal tool (optional but worth it. ~$6 at auto parts store.)
-- Paper & pen for screw retention sketch
(Note, my tiny screwdriver has duct tape on the tip to protect the car's hardware)
Special Note for screw removals:
I find it’s often easy to lose track of screws, or remember which screw goes where. I recommend using your pen & paper to draw a sketch of the door and handle area, showing the screw locations. Then, when you remove each screw, pierce the paper with the screw near the sketched location. Here is mine, to show you what I mean:
--End of first post--


") added to the all DIY post
added to the all DIY post 


